
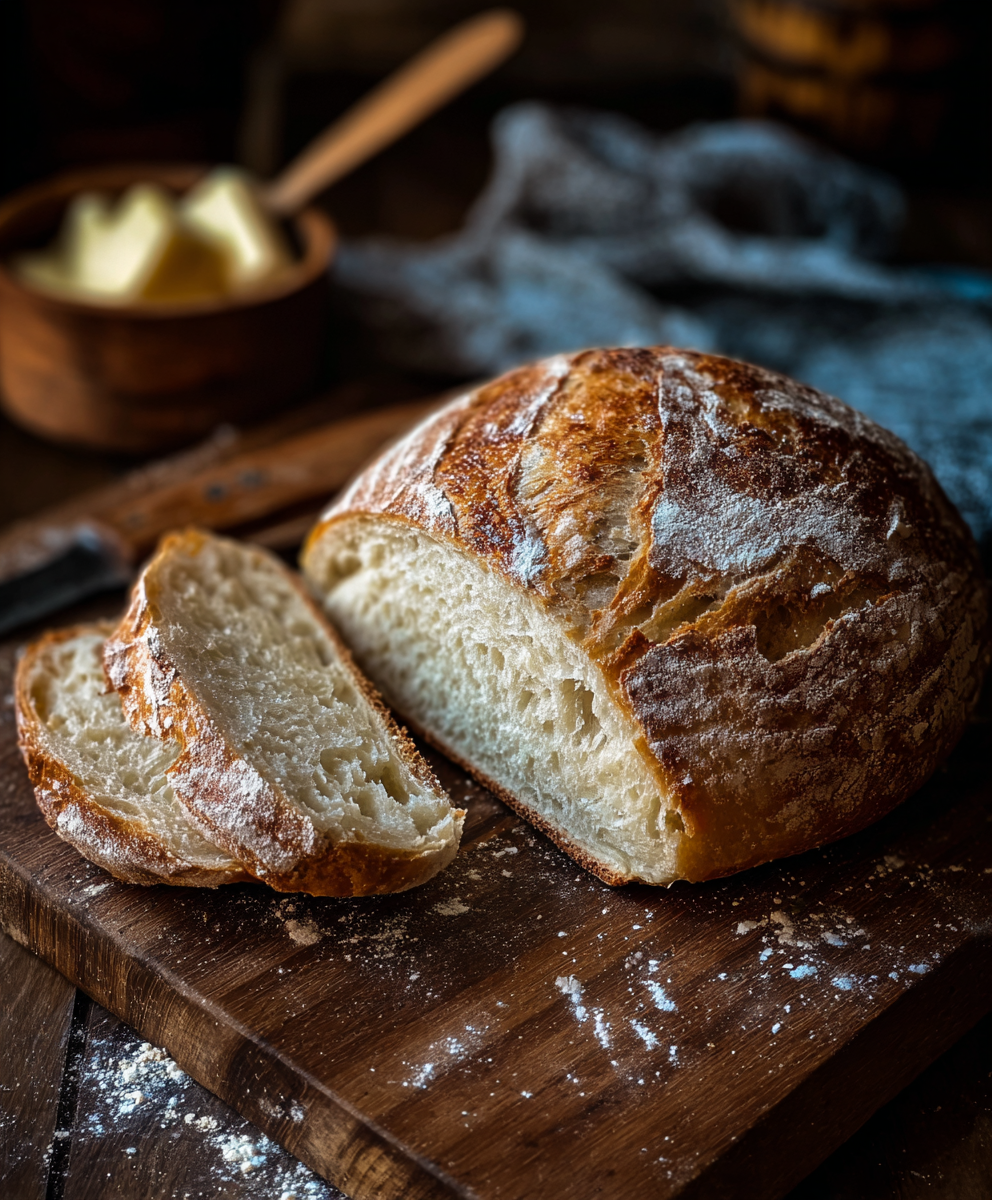
No Knead Gluten Free Bread

A simple, hands-off loaf that yields a tender, crusty gluten-free bread with minimal effort — perfect for weeknights and special breakfasts.

This no-knead gluten free bread has been a quiet revelation in my kitchen. I first developed this version during a week when I needed a reliable loaf that didn't rely on hours of active attention or complicated machinery. The result is a tender crumb with a crisp, golden crust and a mild, slightly sweet flavor. It fills the house with the warm, comforting scent of baking bread without the usual fuss, and it has become my go-to solution when I want fresh bread fast and reliably.
What makes this loaf special is the simplicity: a single bowl, a few pantry staples, and a gentle rise that does the work for you. The texture is soft and slightly open, with a satisfying chew that holds up to toasting and sandwiches. Because it uses instant yeast and a small amount of olive oil, the crust develops a beautiful sheen and the interior stays moist for days when stored correctly. Friends and family who usually hesitate about gluten-free alternatives have been pleasantly surprised by how close it comes to traditional bread.
Why You'll Love This Recipe
- This loaf is entirely hands-off after the quick mixing step — ready to bake after one gentle rise, making it perfect for busy weeknights or weekend baking when you don’t want to stand over dough.
- Uses common pantry staples: gluten-free all-purpose flour, instant yeast, salt, a touch of sugar or honey, warm water, and olive oil — nothing exotic to hunt down.
- Yield: one medium loaf that slices into approximately 8 servings, ideal for sandwiches, toast, or accompanying soups and salads.
- Quick active time: about 10 minutes to mix; passive rising for structure-building means you can prepare other dishes while it proofs.
- Make-ahead friendly: dough can be delayed in the refrigerator for a slow rise or the baked loaf freezes well for up to three months.
- Adaptable: swap the sugar for honey for deeper flavor, add seeds or herbs for variety, or use a blend of flours labeled gluten-free for different textures.
From my experience, this recipe consistently produces a dependable loaf whether I’m making it on a weekday evening or prepping for a weekend brunch. Family members who normally prefer regular bread enjoy the crumb and crust, and I love how forgiving the method is — minor variations in temperature or flour brand rarely derail the outcome.
Ingredients
- Gluten-free all-purpose flour (2 cups): Look for a blend with xanthan gum included for structure (Bob's Red Mill 1-to-1 or King Arthur Measure for Measure are reliable). Using a well-balanced commercial blend prevents gummy texture and gives the best rise.
- Salt (1 teaspoon): Use fine sea salt or kosher salt measured by volume; it enhances flavor and controls yeast activity. Avoid iodized table salt in larger quantities for the best taste.
- Instant yeast (1 teaspoon): Instant yeast works directly with dry ingredients — no proofing required — and gives a predictable rise. Ensure the yeast is fresh for best lift.
- Sugar or honey (1 tablespoon): A small sweetener jump-starts the yeast and rounds flavors. Use white sugar for a neutral taste or mild honey for extra depth; adjust for dietary needs.
- Warm water (1 1/2 cups): Aim for about 105–115°F to activate yeast without killing it. If you don’t have a thermometer, the water should feel warm to the wrist but not hot.
- Olive oil (1 tablespoon): Adds richness and helps keep the crumb tender. Choose a mild extra-virgin olive oil if you want a slight fruity note; regular olive oil is fine for a neutral profile.
Instructions
Mix the Dry Ingredients: In a large mixing bowl, whisk together the gluten-free flour, salt, and instant yeast until evenly combined. Use a fork or whisk to break up any clumps and ensure that the leavening is distributed — this prevents uneven pockets of yeast or salt in the finished loaf. Add the Wet Ingredients: Make a well in the center of the dry mix, then pour in the warm water, sugar or honey, and olive oil. Stir with a sturdy spatula or wooden spoon until a wet, shaggy dough forms. The dough will be looser than traditional wheat dough — it should resemble a thick batter rather than a firm ball. First Rise: Cover the bowl loosely with plastic wrap or a kitchen towel and leave in a warm spot for 60–90 minutes, or until slightly puffy and increased in size. In cooler kitchens, allow up to 2 hours. You’re looking for a gentle expansion rather than a dramatic dome. Shape the Dough: Transfer the sticky dough to a well-floured surface (use additional gluten-free flour). With floured hands or a bench scraper, fold the dough over itself a couple of times to build surface tension, then shape into a round or oblong loaf depending on your baking vessel. Prepare for Baking: Preheat the oven to 450°F and place a Dutch oven, heavy pot with lid, or a baking stone inside to heat. Let it come to full temperature for at least 30 minutes so the vessel is thoroughly hot — this creates steam and a crisp crust when the dough is introduced. Bake the Bread: Carefully transfer the shaped dough into the preheated pot (use parchment paper for easier handling). Score the top with a sharp knife or lame, cover, and bake for 25 minutes. Remove the lid and bake another 15–20 minutes until the crust is deep golden brown and the internal temperature reaches about 205–210°F. Cool & Enjoy: Carefully remove the loaf and place on a wire rack. Let it cool at least 1 hour before slicing to set the crumb and avoid a gummy interior. Once cool, slice and enjoy — toasted or fresh.
You Must Know
- The loaf freezes beautifully for up to three months when sliced and stored in a freezer bag — toast slices directly from frozen for best texture.
- Because gluten-free blends vary, expect slight differences in crumb and rise between brands; measure flour by spooning into the cup rather than scooping.
- Use warm water (105–115°F) to activate the yeast; water that is too hot will kill the yeast and prevent rising.
- No-knead methods rely on time and hydration for structure — resist the temptation to add too much extra flour while shaping to maintain tenderness.
My favorite aspect of this loaf is how forgiving it is. I’ve baked it on hectic mornings with only ten minutes of attention and achieved consistent results. Guests often ask if it was from a bakery — it holds its own at breakfast tables and pairs well with everything from scrambled eggs to hearty soups.
Storage Tips
Store cooled slices in an airtight container or bag at room temperature for up to 3 days to maintain softness. For longer storage, slice the loaf and freeze in single layers separated by parchment in a freezer-safe bag. When reheating, toast frozen slices directly or warm whole loaves in a 325°F oven covered with foil for 10–15 minutes to revive moisture without overbrowning the crust. Avoid refrigerating the bread — refrigeration accelerates staling for gluten-free loaves.
Ingredient Substitutions
If your blend lacks xanthan gum, add 1/2 teaspoon per cup of flour to improve texture and elasticity; alternatively, 1 teaspoon of psyllium husk per cup creates an excellent binder and gives a chewier crumb. Replace sugar with maple syrup or agave in equal volume, or use honey for a richer taste (note: honey makes the loaf non-vegan). For a nuttier profile, substitute up to 1/3 cup of the flour with almond flour but reduce water slightly to prevent a gummy center.
Serving Suggestions
Serve slices toasted with butter and jam for breakfast or transform into sandwiches — the loaf stands up well to fillings like grilled vegetables, melted cheese, or avocado and smoked salmon. For dinner, pair thick slices with soups, stews, or make garlic toast topped with herbs and olive oil. Garnish with flaky sea salt and fresh thyme after a light brush of olive oil for an elegant presentation.
Cultural Background
No-knead approaches have roots in rustic European baking where long fermentation and minimal handling yield excellent structure without intensive labor. This gluten-free interpretation adapts that philosophy — using hydration and time to develop crumb rather than gluten development. While not tied to a single regional tradition, the technique mirrors artisanal methods and modern dietary adaptations that keep the soul of home-baked bread alive for those avoiding gluten.
Seasonal Adaptations
In autumn and winter, stir in 1–2 teaspoons of warm spices like cinnamon and cardamom and add 1/4 cup chopped pecans for a cozy loaf. Spring and summer benefit from fresh herbs — fold 1–2 tablespoons chopped rosemary or dill into the dough before shaping. For holiday meals, top with seeds like pumpkin or sesame after an egg wash substitute (brush with olive oil) to add festive texture and flavor.
Meal Prep Tips
Prepare dough the evening before and refrigerate for a slow, cold rise to deepen flavor — shape and bake the next day. Alternatively, bake a loaf and slice immediately after cooling, portion into meal-sized bags, and freeze. Label with date and plan to use within three months. For efficient breakfasts, keep a toaster on hand and store a small jar of compound butter or herb oil to finish slices in seconds.
Every loaf tells a small story of patience and the joy of simple baking. This recipe invites you to experiment and make it your own — tweak sweeteners, add mix-ins, or slow down the rise to suit your schedule. Share a slice and enjoy the warmth of homemade bread with those you love.
Pro Tips
Measure flour by spooning into the cup rather than scooping to avoid a dense loaf.
Let the loaf cool completely before slicing to prevent a gummy interior.
If your flour blend lacks a binder, add 1/2 teaspoon xanthan gum per cup or 1 teaspoon psyllium husk.
This nourishing no knead gluten free bread recipe is sure to be a staple in your kitchen. Enjoy every moist, high protein slice — it is perfect for breakfast or as a wholesome snack any time.
FAQs about Recipes
Can I use hot water to speed up the rise?
Yes — use warm water around 105–115°F. If the water is too hot, it can kill the yeast and the dough will not rise.
How long can I freeze the bread?
Yes, slice the cooled loaf and freeze in a sealed bag for up to three months. Toast or warm slices directly from frozen.
Tags
No Knead Gluten Free Bread
This No Knead Gluten Free Bread recipe makes perfectly juicy, tender, and flavorful steak every time! Serve with potatoes and a side salad for an unforgettable dinner in under 30 minutes.
Ingredients
Main
Instructions
Mix the Dry Ingredients
Whisk flour, salt, and instant yeast together in a large bowl until evenly combined.
Add the Wet Ingredients
Pour in warm water, sugar (or honey), and olive oil; stir until a thick, sticky dough forms.
First Rise
Cover and leave in a warm spot for 60–90 minutes until the dough becomes slightly puffy.
Shape the Dough
Turn the dough onto a floured surface, fold a couple times to create surface tension, then shape into a loaf.
Prepare for Baking
Preheat oven to 450°F with a Dutch oven or heavy pot inside for at least 30 minutes to ensure the vessel is thoroughly hot.
Bake the Bread
Place dough in the hot pot on parchment, cover and bake 25 minutes; uncover and bake another 15–20 minutes until golden and 205–210°F internal.
Cool & Enjoy
Remove loaf to a rack and cool at least 1 hour before slicing to set the crumb.
Last Step: Please leave a rating and comment letting us know how you liked this recipe! This helps our business to thrive and continue providing free, high-quality recipes for you.
Nutrition
Did You Make This?
Leave a comment & rating below or tag
@festive-cooks on social media!
Categories:
You might also like...

Air Fryer Apple Fries
Crispy, cinnamon-sugar coated apple fries made in the air fryer — a quick, family-friendly snack or dessert ready in under 30 minutes.

Air Fryer Bacon Cheese Croissants
Golden, flaky croissants filled with ham, melted cheddar and Swiss, finished with a glossy egg wash and cooked in the air fryer for quick, crowd pleasing results.

Air Fryer Bang Bang Cauliflower
Crispy air fryer cauliflower tossed in a creamy sweet-spicy bang bang sauce for a crowd-pleasing, quick appetizer or weeknight treat.
Did You Make This?
Leave a comment & rating below or tag @festive-cooks on social media!
Rate This Recipe
Share This Recipe
Enjoyed this recipe? Share it with friends and family, and don't forget to leave a review!
Comments (1)
This recipe looks amazing! Can't wait to try it.
Comments are stored locally in your browser. Server comments are displayed alongside your local comments.

Hi, I'm Jessica!
What's Popular

30-Minute Meals!
Join to receive our email series which contains a round-up of some of our quick and easy family favorite recipes.