
No-Bake Cookie Lasagna

A festive, no-bake layered dessert with an Oreo crust, creamy cheesecake layer, chocolate and vanilla puddings, and a fluffy topping—finished with holiday sprinkles and candies.
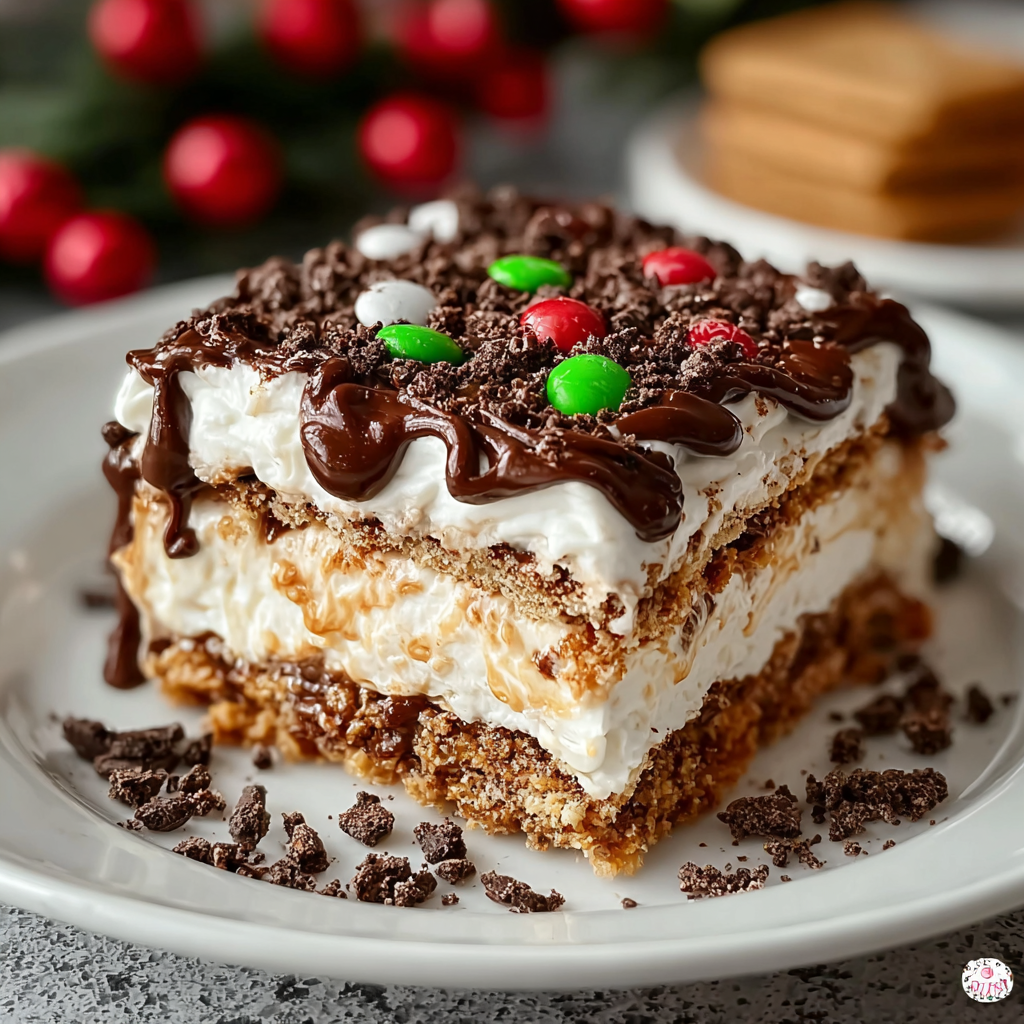
This no-bake cookie lasagna is my go-to dessert for holiday gatherings and last-minute celebrations. I first created this layered treat one December when I wanted something that looked impressive but required minimal time over a hot stove. The end result was a silky cream-cheese layer over a crunchy Oreo crust, followed by a ribbon of chocolate and vanilla puddings and a cloud of whipped topping. It’s sweet without being cloying, and the texture contrast—crisp crust, smooth fillings, and light topping—keeps every spoonful interesting.
I love how forgiving this dish is: the components come together quickly, and you can make it a day ahead so you’re free to enjoy your party. It reminds me of a holiday potluck where even the pickiest of my family members went back for seconds. The visual appeal of the layered colors, plus the bright sprinkles and mini candies on top, makes it especially fun for seasonal gatherings. Whether you serve it at a winter party or a birthday, this dessert feels celebratory and nostalgic.
Why You'll Love This Recipe
- Ready in about 30 minutes of active prep and then chilled for 4 hours—great for making ahead so you’re not stuck in the kitchen during the event.
- Uses pantry staples and store-bought conveniences like sandwich cookies, instant pudding mixes, and frozen whipped topping for fast assembly.
- Textural contrast: crunchy Oreo-based crust pairs with a tangy cream-cheese layer and velvety puddings for a multi-layer experience.
- Highly customizable—swap the candies, change pudding flavors, or use gluten-free cookies for dietary needs.
- Crowd-pleaser that travels well: assemble in a 9x13 pan and transport chilled to parties without stress.
- Minimal equipment required—no oven, no complicated techniques—ideal for novice cooks and busy hosts.
I remember serving this at a family cookie exchange; people asked for the recipe and the host wanted an extra pan to send home. I’ve learned a few tricks—like pressing the crust firmly and letting puddings set briefly before layering—to keep the lines between layers crisp and clean. It’s become my default for holiday tables because it’s festive, forgiving, and always disappears quickly.
Ingredients
- Oreo cookies (36 cookies): Use classic sandwich cookies for the strongest chocolate-cookie flavor and firm crumbs. I usually buy the regular Oreo brand or store equivalent. Crushing finely gives a compact crust that holds together when chilled.
- Unsalted butter (1/2 cup, melted): Melted and mixed with the crumbs, butter binds the base. Unsalted lets you control salt content; use salted if that’s all you have and cut an extra pinch of salt elsewhere.
- Cream cheese (8 oz, softened): Full-fat cream cheese gives the smoothest, richest layer. Let it sit at room temperature for 20–30 minutes for easiest mixing; Philadelphia brand is a reliable option.
- Granulated sugar (1/4 cup): Balances the cream cheese without making it overly sweet. You can adjust by a tablespoon if you prefer a tangier profile.
- Milk (2 tablespoons + 3 cups cold): The 2 tablespoons thin the cream-cheese mixture slightly; the 3 cups cold milk are for the two instant pudding boxes (1 1/2 cups each).
- Vanilla extract (1 teaspoon): Adds warmth and depth to the cream-cheese layer—pure vanilla extract is best.
- Whipped topping (1 1/2 cups + 1 1/2 cups): I use frozen whipped topping like Cool Whip, thawed. One portion folds into the cream-cheese for a lighter texture; the second portion finishes the top.
- Instant vanilla pudding mix (1 box, 3.4 oz) and instant chocolate pudding mix (1 box, 3.4 oz): Choose well-known brands like Jell-O for consistent set times and flavor.
- Mini M&Ms or holiday candies & Christmas sprinkles: Adds festive color and a crunchy pop in every bite. Add to taste.
Instructions
Step 1 — Prepare the crust: Place 36 Oreo cookies in a food processor and pulse to a fine crumb; if you don’t have a processor, seal cookies in a heavy-duty bag and crush with a rolling pin until fine. Combine crumbs with 1/2 cup melted unsalted butter in a mixing bowl and stir until the mixture resembles wet sand. Press the mixture evenly into the bottom of a 9x13-inch pan using the back of a measuring cup to compact it. Chill in the refrigerator while you prepare the next layers—about 10–15 minutes helps the butter set so the crust won’t crumble. Step 2 — Make the cream-cheese layer: Beat 8 ounces softened cream cheese with 1/4 cup granulated sugar, 2 tablespoons milk, and 1 teaspoon vanilla extract until smooth and lump-free using an electric mixer. Fold in 1 1/2 cups thawed whipped topping gently to keep the mixture light. Spread this evenly over the chilled crust, smoothing the top with a spatula. The cream-cheese layer should be thick enough to create a stable barrier between crust and puddings—about 1/2 to 3/4 inch thick. Step 3 — Prepare the puddings: In separate bowls, whisk the chocolate pudding mix with 1 1/2 cups cold milk until smooth; repeat with the vanilla pudding mix and 1 1/2 cups cold milk. Instant pudding sets quickly—after about 2 minutes it will begin to thicken. Let the puddings sit for 3–5 minutes so they’re spoonable but not fully firm; this helps them form clean layers without seeping into the cream-cheese layer. Step 4 — Layer the puddings: Spoon the chocolate pudding first in an even layer over the cream-cheese, smoothing gently with an offset spatula. Next, carefully add the vanilla pudding layer on top, smoothing to create an even surface. Take care to distribute each layer evenly so the final cut shows distinct bands of color. Step 5 — Top and chill: Spread the remaining 1 1/2 cups whipped topping over the vanilla pudding for a light finish. Decorate with Christmas sprinkles and mini M&Ms or holiday candies. Cover the pan loosely with plastic wrap and chill for at least 4 hours, or ideally overnight. Chilling allows the layers to set and the flavors to meld; for the best slices, chill overnight.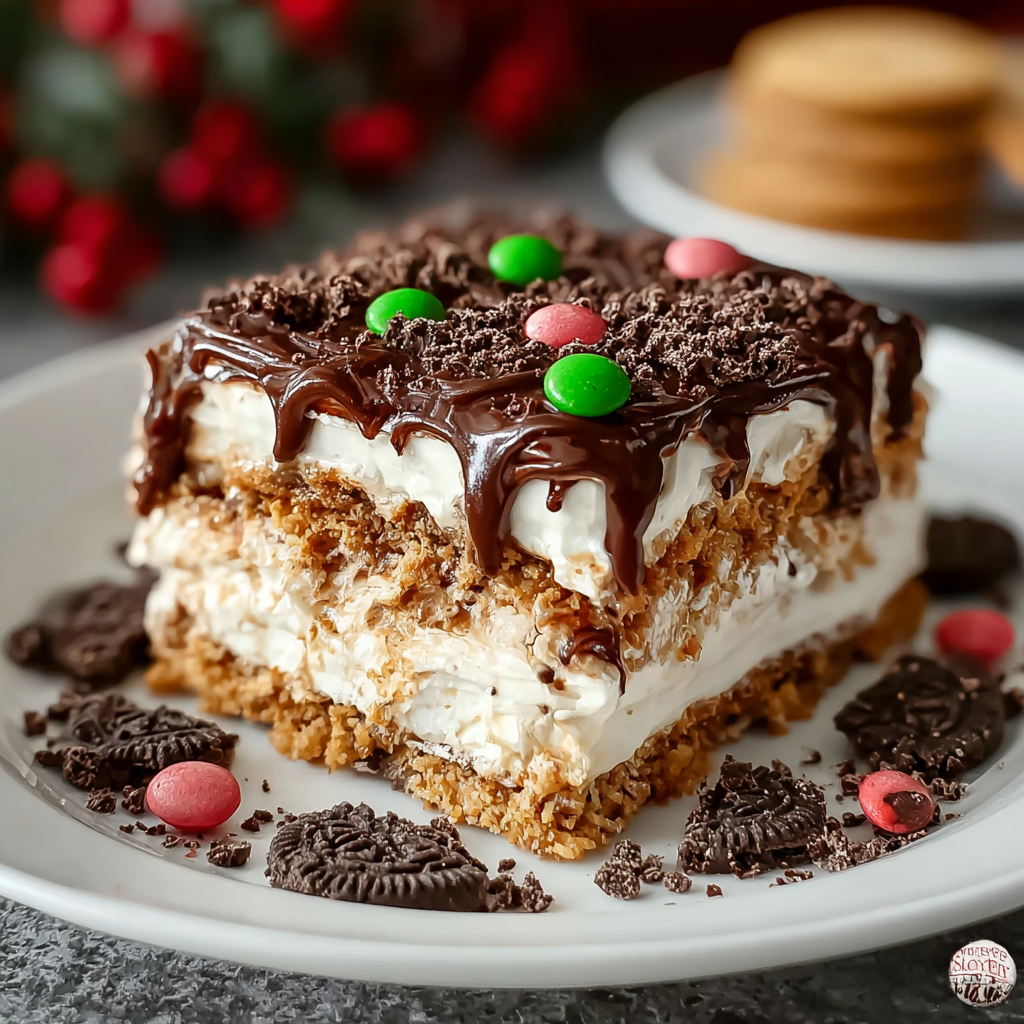
You Must Know
- This dessert is rich in sugar and dairy and best enjoyed in small portions; it freezes well for up to three months when wrapped tightly.
- Because the base contains sandwich cookies, this is not gluten-free unless you use certified gluten-free sandwich cookies.
- The instant pudding will firm up as it chills; avoid using double the milk or the layers will be too soft to set cleanly.
- Leftovers keep in the refrigerator for 3–4 days; the crust softens over time but still tastes great.
- For sharper flavor contrast, use full-fat cream cheese and chilled whole milk with the pudding mixes.
My favorite aspect of this dish is how the texture evolves: the first day the crust is crisp, and by day two it softens into a fudgy base that melds with the puddings. I’ve brought this to potlucks and holiday dinners where folks comment on the pretty layers before they even taste it. Every time, someone asks for the recipe and takes a photo to remember the combination of flavors and colors.

Storage Tips
Store covered in the refrigerator for up to 3–4 days. Use an airtight lid or cling film pressed close to the whipped topping to prevent absorption of fridge odors. For longer storage, cut into portions and freeze on a baking sheet until solid, then transfer slices to an airtight freezer container; frozen slices keep up to 3 months. Thaw overnight in the refrigerator before serving. To refresh the top after thawing, add a thin layer of whipped topping and fresh sprinkles just before serving.
Ingredient Substitutions
If you need dairy-free options, swap cream cheese and whipped topping for dairy-free alternatives; choose instant pudding mixes labeled dairy-free or make stovetop puddings with plant-based milk and a cornstarch slurry. Replace Oreos with gluten-free sandwich cookies to accommodate gluten-free diets. For a lower-sugar version, use sugar-free instant puddings and a reduced-sugar whipped topping, but expect a slight change in texture and sweetness. Mini chocolate candies can be replaced with chopped dried fruit or chopped nuts for a different crunch.
Serving Suggestions
Serve chilled in even slices, garnished with extra mini candies, chopped toasted nuts, or a dusting of cocoa for contrast. Pair with black coffee or a lightly brewed tea to balance the sweetness. For a holiday table, present the pan on a cake stand and add fresh mint leaves for color. This dessert also works well in individual parfait glasses—layer smaller amounts of crust, cream-cheese mixture, puddings, and whipped topping for easy portion control.
Cultural Background
Layered no-bake desserts have roots in American home cooking where convenience and presentation meet. This version borrows the idea of an Icebox cake and pudding salads that gained popularity in mid-20th century America, combining packaged ingredients into celebratory dishes. Over time, home cooks have adapted those formats into modern layered dishes that emphasize texture contrast and visual appeal, making them staples at potlucks, holiday gatherings, and family celebrations.
Seasonal Adaptations
To make this dessert seasonal, change the topping and candies: use red-and-green sprinkles for Christmas, pastel candies for spring, or pumpkin-spice whipped topping and crushed gingersnaps as a crust for autumn. In summer, add fresh berries between the pudding layers for brightness. For Valentine’s Day, pipe whipped cream rosettes on top and sprinkle with edible glitter or crushed candy hearts.
Meal Prep Tips
Assemble the crust and cream-cheese layer a day ahead, keep pudding and topping chilled separately, and finish the final layers a few hours before serving for the freshest appearance. Pack in a sturdy pan with a tight lid for transport; keep chilled in an insulated cooler with ice packs. When prepping for large gatherings, double the recipe and assemble in two pans to reduce cutting time and allow smaller slices for guests.
This layered treat brings color and comfort to any table. It’s simple enough for a novice but pretty enough to impress your guests—try it once and it’ll likely become a repeat on your holiday menu.
Pro Tips
Press the crust firmly and chill before adding the cream-cheese layer to keep distinct strata.
Let instant puddings stand 3–5 minutes after mixing so they’re spoonable but not too loose when layering.
Use room-temperature cream cheese to avoid lumps and achieve a silky cream-cheese layer.
Chill for at least 4 hours or overnight for the cleanest slices.
If transporting, freeze briefly to firm up the layers and keep cool in an insulated carrier.
This nourishing no-bake cookie lasagna recipe is sure to be a staple in your kitchen. Enjoy every moist, high protein slice — it is perfect for breakfast or as a wholesome snack any time.
FAQs about Recipes
Can I freeze this dessert?
Yes—remove from the freezer and thaw in the refrigerator overnight. Refresh the top with a thin layer of whipped topping before serving for best texture.
How do I make a firm crust without an oven?
Use a food processor for fine crumbs; if you don’t have one, place cookies in a sealed bag and crush with a rolling pin. Press the crust firmly into the pan to prevent crumbling.
Tags
No-Bake Cookie Lasagna
This No-Bake Cookie Lasagna recipe makes perfectly juicy, tender, and flavorful steak every time! Serve with potatoes and a side salad for an unforgettable dinner in under 30 minutes.
Ingredients
Crust
Cream layer
Pudding layers
Topping
Instructions
Prepare the crust
Crush 36 sandwich cookies to fine crumbs in a food processor or sealed bag. Mix crumbs with 1/2 cup melted unsalted butter until combined. Press firmly into the bottom of a 9x13-inch pan and chill 10–15 minutes.
Make the cream-cheese layer
Beat 8 oz softened cream cheese with 1/4 cup sugar, 2 tablespoons milk, and 1 teaspoon vanilla until smooth. Fold in 1 1/2 cups thawed whipped topping and spread evenly over the chilled crust.
Prepare the puddings
Whisk each instant pudding mix with 1 1/2 cups cold milk in separate bowls. Let stand 3–5 minutes until thickened but still spoonable.
Layer the puddings
Spoon the chocolate pudding over the cream-cheese layer, smooth gently, then add the vanilla pudding and level the surface.
Top and chill
Spread the remaining 1 1/2 cups whipped topping on the vanilla layer, decorate with sprinkles and mini candies, then cover and chill at least 4 hours or overnight.
Last Step: Please leave a rating and comment letting us know how you liked this recipe! This helps our business to thrive and continue providing free, high-quality recipes for you.
Nutrition
Did You Make This?
Leave a comment & rating below or tag
@festive-cooks on social media!
Categories:
You might also like...

Air Fryer Apple Fries
Crispy, cinnamon-sugar coated apple fries made in the air fryer — a quick, family-friendly snack or dessert ready in under 30 minutes.

Air Fryer Bacon Cheese Croissants
Golden, flaky croissants filled with ham, melted cheddar and Swiss, finished with a glossy egg wash and cooked in the air fryer for quick, crowd pleasing results.

Air Fryer Bang Bang Cauliflower
Crispy air fryer cauliflower tossed in a creamy sweet-spicy bang bang sauce for a crowd-pleasing, quick appetizer or weeknight treat.
Did You Make This?
Leave a comment & rating below or tag @festive-cooks on social media!
Rate This Recipe
Share This Recipe
Enjoyed this recipe? Share it with friends and family, and don't forget to leave a review!
Comments (1)
This recipe looks amazing! Can't wait to try it.
Comments are stored locally in your browser. Server comments are displayed alongside your local comments.

Hi, I'm Jessica!
What's Popular

30-Minute Meals!
Join to receive our email series which contains a round-up of some of our quick and easy family favorite recipes.