
No Bake Christmas Peppermint Pie

A festive, no-bake peppermint cream pie with an Oreo crust — cool, creamy, and perfect for holiday gatherings.
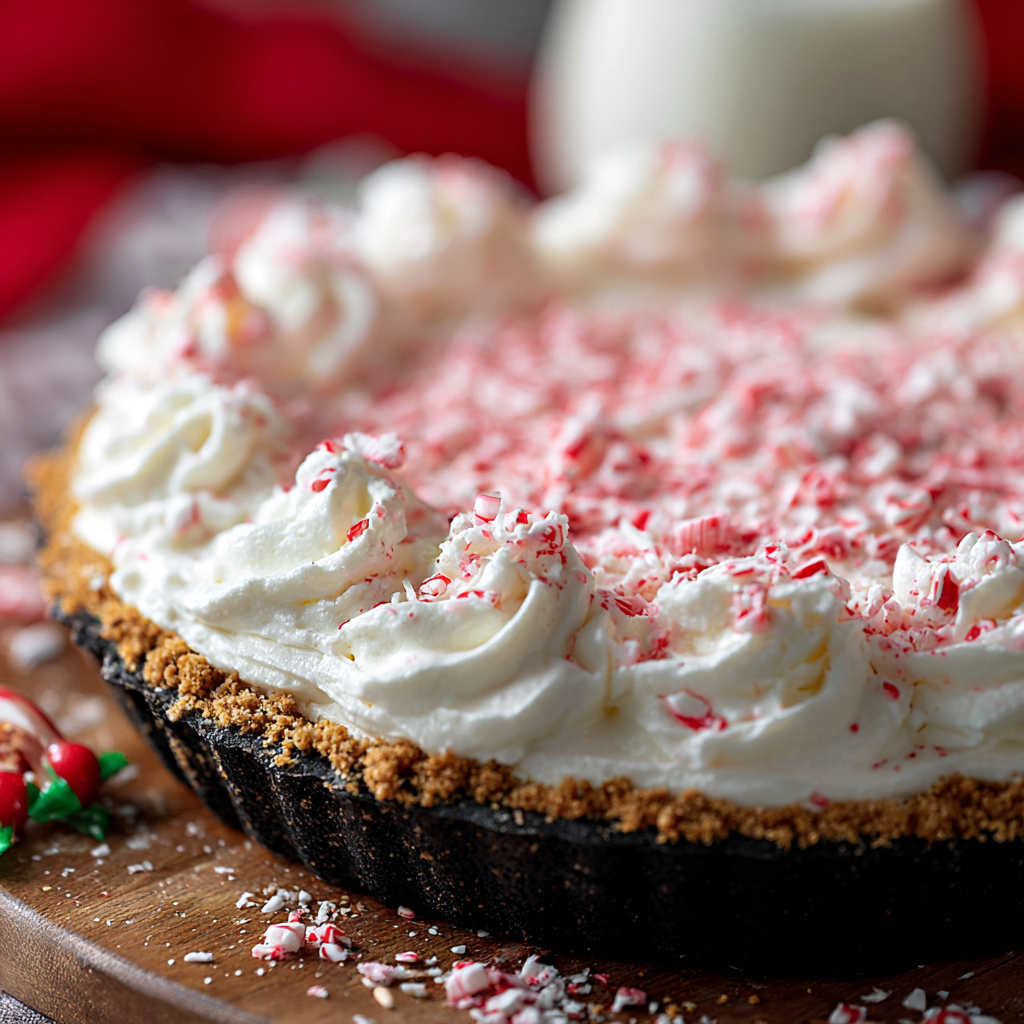
This peppermint cream pie became my holiday showstopper the year I discovered how a few pantry staples can transform into something festive and unforgettable. I first made it on a busy December weekend when I needed a last-minute dessert that still felt special; the result was a glossy, minty filling with a delicate pink swirl set in a crisp Oreo crust. It’s bright, cool, and just sweet enough — the type of dessert that invites conversation and seconds. Because it sets in the refrigerator rather than the oven, it’s a lifesaver for crowded kitchens during the holidays.
What I love most about this pie is the contrast of textures and flavors: the crunchy chocolate cookie base, the silky cream-cheese filling scented with vanilla and peppermint, and the light whipped topping that softens each bite. The peppermint candy sprinkled on top adds a satisfying crunch and a cheerful look that always earns compliments. I usually make this for gatherings where I want something that looks impressive but is genuinely simple to prepare — it’s become my go-to contribution for parties and family dinners.
Why You'll Love This Recipe
- Ready with about 20 minutes of active prep — no oven required, which frees up time and space when you’re cooking multiple dishes for the holidays.
- Uses pantry staples and a pre-made Oreo pie crust so it’s accessible even when you’re short on time or ingredients.
- Texture contrast: silky cream-cheese filling, light whipped topping, and crunchy peppermint garnish create a dynamic bite every time.
- Make-ahead friendly — assemble the day before and keep chilled; it deepens in flavor overnight and stays fresh for party service.
- Customizable appearance: a few drops of red food color give a gentle pink hue for a festive look, and you can vary garnish styles for a rustic or elegant finish.
- Kid-friendly and crowd-pleasing — peppermint and chocolate are a classic holiday pairing that most people love.
Personally, the first time I brought this to a family holiday the dish disappeared so quickly my aunt asked for the recipe on the spot. Over the years I’ve tweaked tiny details — changing the peppermint intensity, experimenting with candy crush size, and trying different whipped toppings — but the core method remains the same because it reliably delivers bright, creamy flavor with minimal fuss.
Ingredients
- Oreo pie crust: Use one pre-made 9-inch Oreo cookie pie crust (store-bought) for convenience and consistent texture; the chocolate base balances the mint perfectly.
- Vanilla extract: 2 teaspoons of pure vanilla extract (I recommend McCormick) — it rounds out the mint and adds depth to the filling.
- Cream cheese: Two 8-ounce packages (16 ounces total) softened to room temperature for a smooth, lump-free filling — full-fat yields best texture.
- Crushed peppermint candy: 1/2 cup folded into the filling and additional for garnish; using fresh winter peppermint candies or candy canes gives a bright, crunchy finish.
- Powdered sugar: 1 1/2 cups (confectioners’ sugar) for sweetness and stability in the cream-cheese base.
- Peppermint flavoring: 1 teaspoon — this gives a consistent, clean mint note without watering down the texture like too much liquid extract can.
- Red food color: About 10 drops to create a subtle pink swirl; add gradually until you reach the desired hue.
- Heavy whipping cream: 1 cup, whipped to soft peaks to lighten the filling and add silkiness.
- Whipped topping: One tub (8-ounce Cool Whip or similar), thawed, for the final cloud-like layer.
- Crushed peppermint candy for garnish: A generous sprinkle for sparkle and crunch; pulse in a food processor for fine shards or leave slightly chunkier for texture.
Instructions
Prepare ingredients and equipment: Remove the cream cheese from the refrigerator about 30–60 minutes before starting so it reaches room temperature — this prevents lumps and allows the filling to whip up silky smooth. Chill the heavy cream until very cold (it whips better). Have a 9-inch pre-made Oreo pie crust on hand and thaw any whipped topping according to package directions. Make the cream-cheese base: In a large bowl, use a hand mixer or stand mixer to beat the softened cream cheese with 1 1/2 cups powdered sugar and 2 teaspoons vanilla extract until completely smooth, about 2–3 minutes on medium speed. Scrape the bowl frequently to ensure there are no lumps. The texture should be glossy and spreadable. Flavor and color: Stir in 1 teaspoon peppermint flavoring and 10 drops red food color; mix until just combined. If you prefer a more subtle pink, start with 4–6 drops and increase. Taste at this stage — the peppermint flavor should be noticeable but not overpowering. Fold in whipped cream and candy: Whip 1 cup heavy whipping cream to soft peaks in a chilled bowl, then fold a third at a time into the cream-cheese mixture using a rubber spatula. This keeps the filling light. Gently fold in 1/2 cup crushed peppermint candy so the bits are evenly distributed without deflating the mixture. Assemble in crust: Spoon the filling into the prepared Oreo crust and smooth the top with an offset spatula. Cover tightly with plastic wrap and refrigerate at least 4 hours, ideally overnight, to allow the filling to set and flavors to meld. Chilling is essential — the texture firms and slices cleanly once fully chilled. Finish and garnish: Before serving, spread the thawed tub of whipped topping over the chilled pie or pipe rosettes around the edge. Sprinkle additional crushed peppermint candy over the top for color and crunch. For a polished look, reserve the finest shards for the center and scatter larger pieces near the edges.
You Must Know
- The pie requires at least 4 hours of refrigeration (240 minutes) to set — overnight chilling produces the best texture and clean slices.
- Store leftovers covered in the refrigerator for up to 3 days; the crust will soften slightly but remain flavorful.
- This is a dairy-rich dessert — contains cream cheese, heavy cream, and whipped topping; it is not suitable for vegan diets without modifications.
- Crushed peppermint candies can vary in sweetness and texture; adjusting the amount will change both crunch and intensity.
- Freezing is possible but not recommended if you want the best texture — freezing can create icy spots in the whipped layers.
My favorite aspect is the way a simple red tint and crunchy garnish turn a basic cream pie into something unmistakably holiday. Every year a different family member claims they can tell who made the pie just by the garnish, and that ritual of “whose pie is this?” is part of the memories it creates.
Storage Tips
Refrigerate the pie covered with plastic wrap or in a pie container to prevent the filling from absorbing other fridge odors. It will keep well for up to 3 days; after that the whipped topping may start to weep and the crust softens further. For short-term transport, place the pie on a flat tray, cover with a loose tent of foil, and keep chilled with ice packs. If you must freeze, wrap the whole pie tightly in plastic and aluminum foil and freeze for up to 1 month — thaw in the refrigerator for 12–24 hours before serving and expect some texture changes.
Ingredient Substitutions
To make this without a pre-made crust, use a homemade Oreo crumb crust: pulse 24 Oreo cookies in a food processor, mix with 6 tablespoons melted butter, press into a 9-inch pan, and chill. For a lighter version, substitute light cream cheese and reduced-fat Cool Whip, though texture will be slightly less rich. If peppermint extract is unavailable, swap with an equal amount of pure peppermint oil used sparingly (start with a quarter teaspoon). For a gluten-free option, choose a certified gluten-free chocolate cookie crust.
Serving Suggestions
Serve chilled slices on a dessert plate with a sprig of fresh mint and a dusting of cocoa powder for contrast. Pair with hot beverages like coffee or a rich hot chocolate — the cool mint complements warm drinks beautifully. For an elegant buffet display, garnish each slice with a small shard of peppermint and a piped rosette of whipped topping. This dessert is perfect after heavy holiday meals because it’s light and refreshing.

Seasonal Adaptations
In winter, emphasize peppermint and add a drizzle of hot fudge for a peppermint hot-fudge twist. For a spring twist, swap peppermint for 1 teaspoon of pure vanilla and garnish with fresh berries instead of candy. During Valentine’s Day, use pink-hued food coloring and heart-shaped crushed candies. The base method remains the same — minor flavor swaps can create entirely new seasonal variations while keeping the no-bake convenience.
Meal Prep Tips
Make the filling a day ahead and keep chilled; assemble into the crust the morning of your event for the freshest appearance. Keep the whipped topping separate until just before serving to preserve its texture. If transporting, freeze the pie for 1–2 hours to firm up and reduce settling during transit, then place in a cooler with ice packs and allow it to come to serving temperature in the refrigerator at your destination.
Cultural Background
Mint-and-chocolate desserts have long been associated with winter holidays in American households — peppermint evokes candy canes and seasonal treats. Using an Oreo crust modernizes a classic chiffon or cream pie, connecting convenience-store staples with homemade hospitality. This kind of quick, festive dessert fits into traditions where hosts balance elaborate mains with simple but celebratory sweets.
Whether you serve it at a casual family gathering or a formal holiday table, this peppermint pie delivers nostalgia and freshness with minimal effort. Try making it once and you’ll likely find it becoming part of your holiday rotation.
Pro Tips
Soften cream cheese at room temperature for 30–60 minutes to avoid lumps when mixing.
Whip heavy cream to soft peaks in a chilled bowl to ensure it folds light and holds air.
Chill the assembled pie at least 4 hours (240 minutes) or overnight for clean slices.
Pulse peppermint candies to desired size: finer for texture throughout, larger for decorative crunch.
Use pure vanilla extract and peppermint flavoring for cleaner, more consistent taste than imitation extracts.
This nourishing no bake christmas peppermint pie recipe is sure to be a staple in your kitchen. Enjoy every moist, high protein slice — it is perfect for breakfast or as a wholesome snack any time.
Tags
Recipe data validation failed
Please check the recipe data format. See console for details.
Categories:
You might also like...

Air Fryer Apple Fries
Crispy, cinnamon-sugar coated apple fries made in the air fryer — a quick, family-friendly snack or dessert ready in under 30 minutes.

Air Fryer Bacon Cheese Croissants
Golden, flaky croissants filled with ham, melted cheddar and Swiss, finished with a glossy egg wash and cooked in the air fryer for quick, crowd pleasing results.

Air Fryer Bang Bang Cauliflower
Crispy air fryer cauliflower tossed in a creamy sweet-spicy bang bang sauce for a crowd-pleasing, quick appetizer or weeknight treat.
Did You Make This?
Leave a comment & rating below or tag @festive-cooks on social media!
Rate This Recipe
Share This Recipe
Enjoyed this recipe? Share it with friends and family, and don't forget to leave a review!
Comments (1)
This recipe looks amazing! Can't wait to try it.
Comments are stored locally in your browser. Server comments are displayed alongside your local comments.

Hi, I'm Jessica!
What's Popular

30-Minute Meals!
Join to receive our email series which contains a round-up of some of our quick and easy family favorite recipes.