
Mint Swirl Cookies

Buttery, soft cookies with a refreshing peppermint ribbon and a festive red swirl—perfect for holiday cookie exchanges and cozy evenings.

This batch of mint swirl cookies has been a seasonal favorite for my family since the first time I paired peppermint with a classic vanilla butter base. I discovered the combination during a December cookie swap many years ago when I was trying to add a fresh note to my usual buttery rounds. The peppermint extract lifts the flavor so the cookies never taste cloying, while the red swirl makes them feel celebratory without any complicated decorating. They are soft at the center with lightly crisped edges and a glossy, candy-sparkle finish when rolled in coarse sugar or crushed peppermint.
I remember making these late one snowy evening, the kitchen warm from the oven and the living room filled with mugs of cocoa. My neighbor, a serious cookie critic, took one bite and declared them “perfectly balanced.” That immediate approval made this a staple for holiday trays, school parties, and last-minute hostess gifts. They are surprisingly easy to assemble and travel well, which makes them ideal for batch baking and sharing.
Why You'll Love This Recipe
- These cookies combine pantry-friendly ingredients with a small peppermint twist so you can bake a festive batch without specialty shopping.
- Ready in about 45 minutes from start to finish, including a short chill, making them great for weeknight baking or last-minute gatherings.
- Make-ahead friendly: dough can be refrigerated or frozen, then sliced and baked for fresh cookies on demand.
- The texture is universally appealing: tender inside, lightly crisp at the edge, with just enough peppermint to feel seasonal but not overpowering.
- Coating options let you make a glittery party cookie (coarse sugar) or an intense mint crunch (crushed peppermint candies).
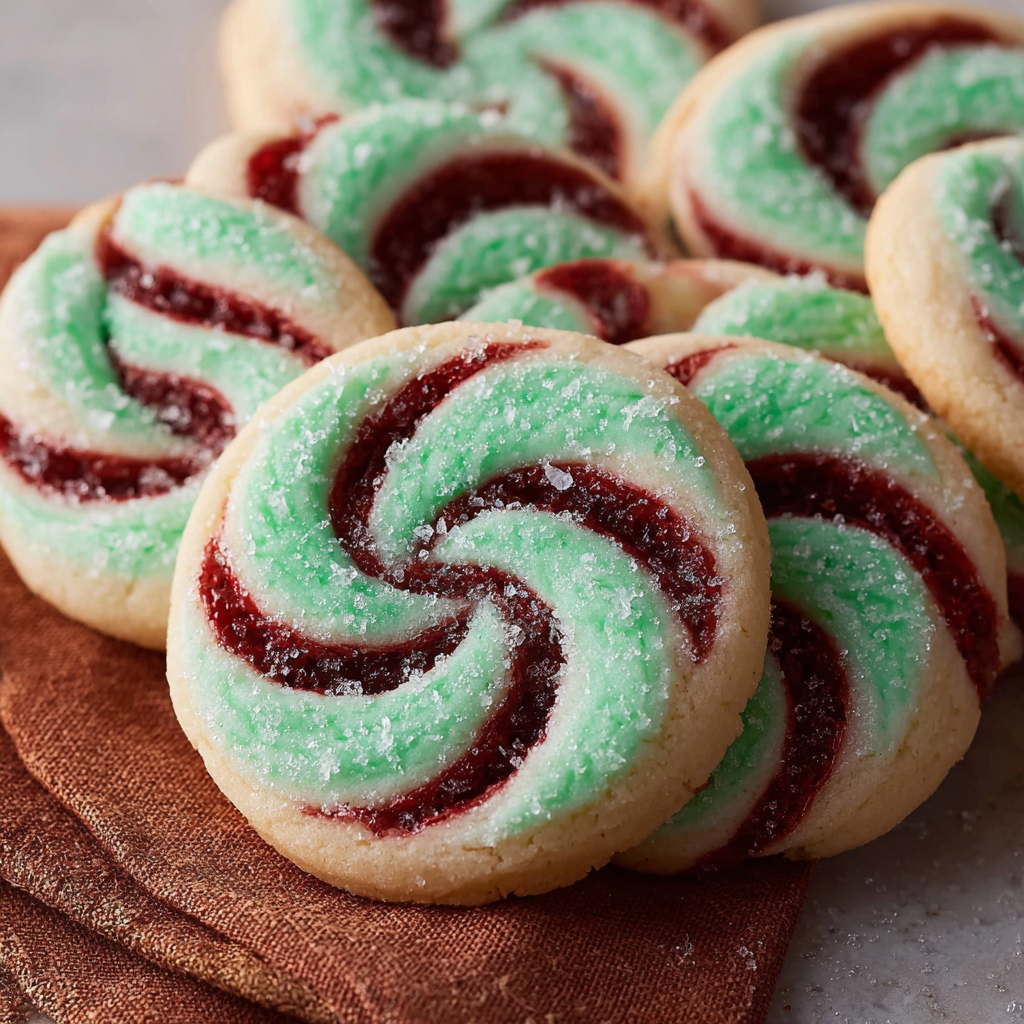
- They’re visually striking with a red swirl that makes them perfect for holiday platters or Valentine’s Day, yet still simple enough for everyday tea.
My family always comments on the color contrast and the delicate peppermint lift. Over the years I’ve learned tiny technique tweaks that keep the swirl tidy and the cookies uniformly sized. These adjustments transformed a good idea into something I love to gift and serve.
Ingredients
- All-purpose flour: Use 2 and 1/2 cups of unbleached all-purpose flour for reliable structure and a tender crumb. King Arthur or Gold Medal are dependable choices.
- Baking powder: 1 teaspoon provides a gentle lift. Make sure it’s fresh; if it’s older than 6 months the rise can be flat.
- Salt: 1/2 teaspoon to balance sweetness and enhance the butter’s flavor. Use fine sea salt or table salt measured by weight for consistency.
- Unsalted butter: 1 cup (2 sticks), softened to room temperature. Use real butter for best flavor; plug-in brands with higher butterfat give a richer result.
- Granulated sugar: 1 cup for subtle sweetness and a tidy spread. If you prefer a chewier edge, swap 1/4 cup for light brown sugar.
- Large egg: 1 egg at room temperature, which helps emulsify and bind the dough.
- Vanilla extract: 1 teaspoon—use pure vanilla extract such as Nielsen-Massey for depth rather than imitation.
- Peppermint extract: 1 teaspoon. This is potent; if using a very strong concentrate, reduce to 3/4 teaspoon and taste the dough.
- Red gel food coloring: A small dab of gel coloring creates a vibrant swirl without thinning the dough like liquid colorings might.
- Coating: 1/4 cup coarse sugar or crushed peppermint candies for rolling. Coarse sugar gives a sparkle; crushed peppermint adds crunch and extra mint flavor.
Instructions
Mise en place and oven: Preheat the oven to 350 degrees Fahrenheit. Line two baking sheets with parchment paper. Measure and assemble all ingredients to avoid interruptions during mixing. Parchment ensures even browning and easy transfer. Dry mix: Whisk together 2 and 1/2 cups all-purpose flour, 1 teaspoon baking powder, and 1/2 teaspoon salt in a medium bowl. Whisking distributes leavening and salt and prevents streaks of baking powder in the dough. Cream butter and sugar: In a large bowl, beat 1 cup softened unsalted butter and 1 cup granulated sugar on medium speed until pale and fluffy, about 3 to 4 minutes. Scrape the bowl halfway through. Proper creaming traps air and yields a lighter cookie. Add egg and extracts: Add the large egg, 1 teaspoon vanilla extract, and 1 teaspoon peppermint extract to the butter mixture and beat until combined. Taste the dough at this point if you wish to adjust peppermint intensity, but remember flavor concentrates will mellow slightly in the oven. Combine dry and wet: Fold the dry ingredients into the wet mixture with a spatula until a soft dough forms. Avoid overmixing; stop when the flour streaks disappear to keep the texture tender. Create the mint swirl: Divide the dough in half on a sheet of plastic wrap. Add a small dab of red gel food coloring to one half and gently knead through the dough using the wrap to keep hands clean. Aim for an even but not overworked color—some marbling is desirable. Roll each half into a 10-inch log and place them side by side. Wrap tightly and chill in the refrigerator for at least 30 minutes so the logs firm up and are easier to slice without distortion. Slice and coat: Unwrap chilled logs and press the two logs together lengthwise to form a single larger log with a visible red ribbon. Slice into 1/4-inch thick rounds. If using crushed peppermint, roll the cut edges gently in the coating before placing on the prepared baking sheets about 1 inch apart. Bake: Bake at 350 degrees Fahrenheit for 10 to 12 minutes until edges are set and the centers still look slightly soft. Rotate pans halfway through for even coloring. Allow cookies to cool on the sheet for 5 minutes before transferring to a wire rack to finish cooling. Storage and finishing: Once cool, store in an airtight container at room temperature for up to 5 days, or freeze layers separated by parchment for up to 3 months.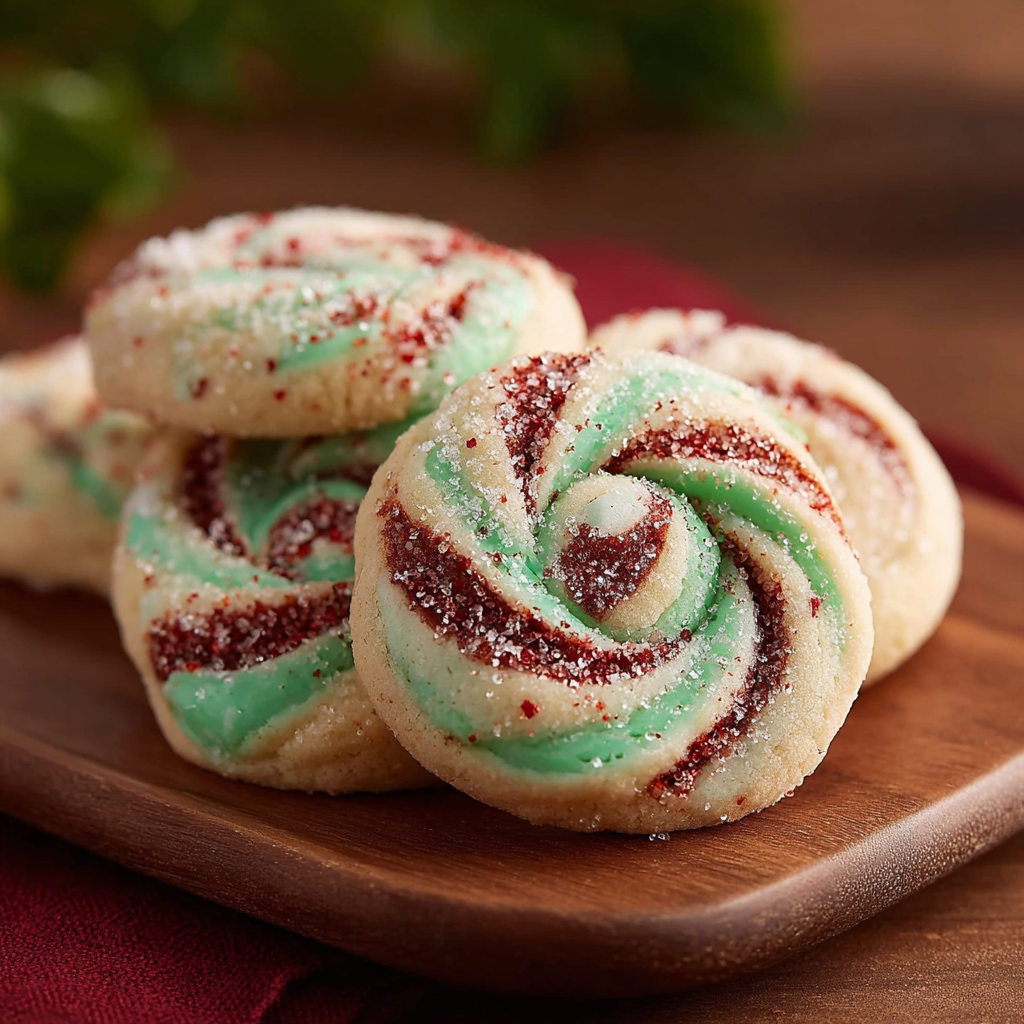
You Must Know
- These treats are not freezer-sensitive once baked: they keep well in the freezer for up to 3 months if wrapped airtight.
- The cookies are moderately high in butter and contain wheat, egg, and dairy; they are not suitable for those avoiding these allergens.
- For even baking, chill the dough so slices hold shape and avoid spreading in the oven.
- Crushed peppermint on the surface will soften after a day; for maximum crunch, add the crushed peppermint just before serving.
My favorite part is the surprise ribbon of red when you break a cookie in half. I once brought a tin to a potluck and a friend insisted on learning the technique, promising to make them annually. That kind of enthusiasm is precisely why I return to this formula each year.
Storage Tips
Store cooled cookies in an airtight container layered with parchment to prevent sticking. At room temperature they remain fresh for up to five days. For longer storage, freeze the baked cookies in single layers on a tray first, then transfer to a freezer-safe container or heavy-duty freezer bag. To refresh after freezing, thaw at room temperature for 30 minutes and warm in a 325 degrees Fahrenheit oven for 4 to 6 minutes if you want that freshly baked warmth and crisp edge.
Ingredient Substitutions
If you need a chewier edge, replace 1/4 cup of the granulated sugar with light brown sugar. For a dairy-free version use a quality vegan stick butter with a slightly saltier profile; reduce added salt by a pinch. If peppermint extract is too intense, substitute 1/2 teaspoon peppermint and 1/2 teaspoon almond extract for a milder, nutty edge. Gluten-free flour blends can work but expect a drier texture; add 1 tablespoon of milk or a touch of extra butter to compensate.
Serving Suggestions
Serve these with hot cocoa, an espresso, or a mug of milky tea. For a holiday platter, alternate with chocolate-dipped shortbreads and thumbprint cookies for color contrast. Garnish with a tiny sprig of fresh mint on the serving tray for aroma. They also pair nicely with gingerbread or spiced nut clusters for a festive selection.
Cultural Background
The idea of swirl patterns in cookies goes back to classic European butter cookies where marbling was both decorative and practical. Peppermint became associated with winter celebrations in many Western traditions because the crisp, cooling flavor complements heavier winter fare. Combining a vanilla butter base with peppermint produces a cookie that bridges old-world baking with contemporary holiday flavors.
Seasonal Adaptations
In winter emphasize peppermint and use crushed candy canes for coating. For Valentine’s Day keep the red swirl but use heart-shaped cookie cutters to transform slices into thematic treats. In summer swap peppermint for 1 teaspoon of lemon extract and use yellow gel to create a citrus swirl for a lighter seasonal take.
Meal Prep Tips
Prepare dough logs a day or two in advance and keep them tightly wrapped in the refrigerator. For longer prep windows freeze logs for up to 2 months. When ready to bake, slice directly from chilled or partially thawed logs; if frozen, let sit for a few minutes so the knife slices cleanly. This approach gives you freshly baked trays on demand with minimal active time.
These mint swirl cookies are approachable, festive, and adaptable. Whether you are building a cookie assortment for friends or just want a minty afternoon treat, this method creates consistently attractive and delicious results. Give the dough a short chill, keep the peppermint measured, and enjoy the happy faces when the ribbon of color is revealed.
Pro Tips
Chill the shaped logs for at least 30 minutes to keep slices neat and prevent excessive spreading in the oven.
Use gel food coloring rather than liquid to avoid changing dough hydration and texture.
If your butter is too soft, the dough will be sticky; return it to the fridge for 10 minutes before slicing.
Rotate baking sheets halfway through the bake to ensure even color and doneness.
For the most vibrant ribbon, lightly marble the colored dough rather than fully blending it into the plain dough.
This nourishing mint swirl cookies recipe is sure to be a staple in your kitchen. Enjoy every moist, high protein slice — it is perfect for breakfast or as a wholesome snack any time.
FAQs about Recipes
Can I freeze unbaked slices?
Yes, you can slice the dough and freeze the slices between parchment layers for up to three months. Bake from frozen with an extra 1 to 2 minutes of oven time.
What can I substitute for peppermint?
Replace peppermint extract with lemon or almond extract in equal amounts for a different flavor profile. Note that peppermint is more potent and may need slight adjustment.
Tags
Mint Swirl Cookies
This Mint Swirl Cookies recipe makes perfectly juicy, tender, and flavorful steak every time! Serve with potatoes and a side salad for an unforgettable dinner in under 30 minutes.
Ingredients
Dough
Coating
Instructions
Preheat and prepare
Preheat oven to 350 degrees Fahrenheit and line baking sheets with parchment paper. Assemble ingredients and measure accurately for smooth workflow.
Whisk dry ingredients
In a bowl, whisk 2 and 1/2 cups flour, 1 teaspoon baking powder, and 1/2 teaspoon salt to distribute leavening evenly.
Cream butter and sugar
Beat 1 cup softened butter and 1 cup sugar until pale and fluffy, about 3 to 4 minutes, to incorporate air for light texture.
Add egg and extracts
Beat in 1 large egg, 1 teaspoon vanilla extract, and 1 teaspoon peppermint extract until combined; taste and adjust peppermint if needed.
Fold dry into wet
Fold the dry mixture into the wet mixture until just combined; avoid overmixing to keep the crumb tender.
Color and form logs
Divide dough, add red gel to half, and shape each half into 10-inch logs. Wrap tightly and chill for at least 30 minutes.
Assemble and slice
Press the two logs together lengthwise, slice into 1/4-inch rounds, and roll edges in coarse sugar or crushed peppermint as desired.
Bake and cool
Bake at 350 degrees Fahrenheit for 10 to 12 minutes until edges are set. Cool on the sheet for 5 minutes, then transfer to a rack to cool completely.
Last Step: Please leave a rating and comment letting us know how you liked this recipe! This helps our business to thrive and continue providing free, high-quality recipes for you.
Nutrition
Did You Make This?
Leave a comment & rating below or tag
@festive-cooks on social media!
Categories:
You might also like...

Air Fryer Apple Fries
Crispy, cinnamon-sugar coated apple fries made in the air fryer — a quick, family-friendly snack or dessert ready in under 30 minutes.

Air Fryer Bacon Cheese Croissants
Golden, flaky croissants filled with ham, melted cheddar and Swiss, finished with a glossy egg wash and cooked in the air fryer for quick, crowd pleasing results.

Air Fryer Bang Bang Cauliflower
Crispy air fryer cauliflower tossed in a creamy sweet-spicy bang bang sauce for a crowd-pleasing, quick appetizer or weeknight treat.
Did You Make This?
Leave a comment & rating below or tag @festive-cooks on social media!
Rate This Recipe
Share This Recipe
Enjoyed this recipe? Share it with friends and family, and don't forget to leave a review!
Comments (1)
This recipe looks amazing! Can't wait to try it.
Comments are stored locally in your browser. Server comments are displayed alongside your local comments.

Hi, I'm Jessica!
What's Popular

30-Minute Meals!
Join to receive our email series which contains a round-up of some of our quick and easy family favorite recipes.