
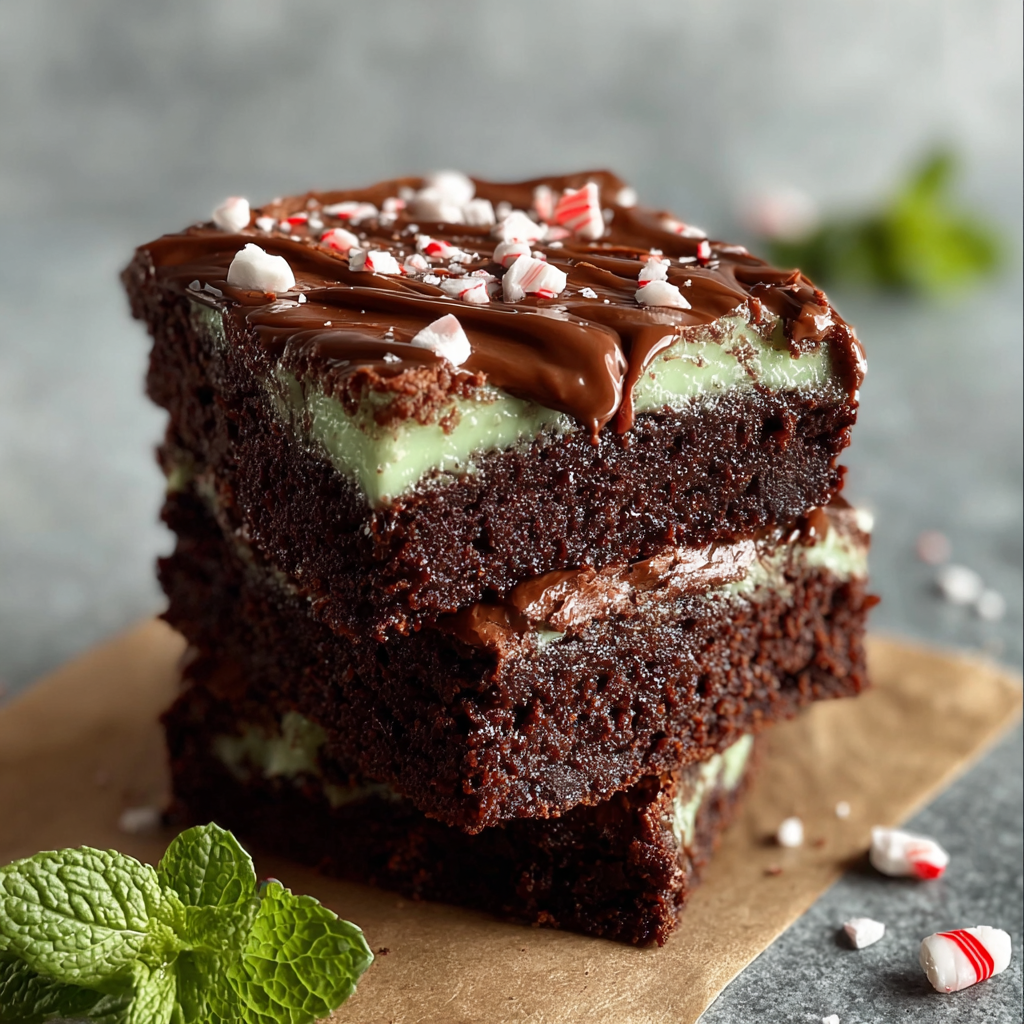
Mint Brownies

Fudgy, mint-kissed chocolate squares that balance deep cocoa with a cool peppermint lift — a simple, festive treat perfect for holidays and weeknight baking.

This batch of mint brownies has been my winter and holiday secret for years. I first stumbled on the combination of deep, fudgy chocolate and a clean peppermint finish on a blustery December afternoon when I had very little in the pantry and a craving for something indulgent. The first bite was an immediate favorite: the crumb is dense and tender, the cocoa notes rounded and the peppermint extract bright without being medicinal. I serve these at family gatherings and neighbors always ask for the recipe — they travel well, freeze beautifully, and feel like a little celebration tucked into a square.
I learned a few things while developing this version: melted butter keeps the texture glossy and chewy, a little cornstarch gives the brownies a soft, almost cake-like resilience without becoming cakey, and a dash of espresso powder sharpens the chocolate so the mint sings in contrast rather than overpowering the palate. Using room-temperature eggs helps the batter emulsify quickly, creating an even rise and smooth interior. These brownies are forgiving, quick to make, and ideal when you want something special but not complicated.
Why You'll Love This Recipe
- Fudgy texture with a tender crumb: melted butter and a touch of cornstarch create a glossy, chewy interior while preventing dryness.
- Quick to prepare: you can mix these in one bowl and have them in the oven within 15 minutes, perfect for last-minute baking.
- Accessible ingredients: everything is pantry-friendly — all-purpose flour, cocoa powder, and standard chocolate chips.
- Customizable mint intensity: use 3/4 teaspoon peppermint extract for a subtle lift or up to 1 teaspoon for a peppermint-forward bite.
- Great for gifting and freezing: cut into squares and store in an airtight container for up to a month in the freezer.
- Crowd-pleaser across ages: kids love the chocolate, adults appreciate the balance of dark cocoa and mint.
I remember handing these out on a snowy evening to neighbors carrying steaming mugs of cider; the response was immediate smiles and a few surprised comments about how perfectly mint and chocolate worked together. My sister swears these are better than store-bought mint bars, and my kids call them 'holiday magic squares.' Every time I bake them, I tweak the mint a touch and watch the differences — it’s become our simple, celebratory ritual.
Ingredients
- Salted butter, 1/2 cup (1 stick) melted: Salted butter adds a subtle savory undertone that enhances chocolate. Use a high-quality butter like Plugr or Land O Lakes for clean flavor and reliable melting behavior.
- Light brown sugar, 3/4 cup + 1 tablespoon: The molasses in light brown sugar gives chew and depth. Measure by spooning into a cup and leveling for accuracy.
- Eggs, 2 large at room temperature: Room-temperature eggs emulsify more easily into warm butter, producing a uniform batter and better rise.
- Peppermint extract, 3/4 teaspoon: Pure peppermint extract (not oil) gives a bright, clean mint note. Start with 3/4 teaspoon and adjust next time if you prefer stronger mint.
- All-purpose flour, 3/4 cup: Spoon and level the flour to avoid packing; too much flour makes the brownies cakier.
- Cocoa powder, 3/4 cup: Use Dutch-processed for milder acidity or natural unsweetened for a sharper chocolate hit. Brands like Valrhona or Hershey’s cocoa will both work.
- Espresso powder, 3/4 teaspoon (optional): A small dash amplifies chocolate richness without making the brownies taste like coffee.
- Cornstarch, 1 tablespoon: Adds tenderness and keeps the center slightly set without crumbling.
- Baking powder, 1/2 teaspoon: A modest lift so the brownies are fudgy but not flat.
- Chocolate chips or chunks, 1/2 cup: Use semi-sweet or bittersweet chips for balance; chopped dark chocolate offers a more gourmet texture.
Instructions
Step 1: Preheat and prepare the pan Preheat your oven to 350°F (175°C). Line an 8x8-inch baking pan with parchment paper, leaving a 1- to 2-inch overhang for easy removal. Lightly grease the pan under the parchment so the paper doesn’t shift during baking. Step 2: Melt butter and combine with sugar Place 1/2 cup salted butter in a heatproof bowl and microwave in 20-second bursts or melt gently on the stovetop until just liquefied. Whisk in 3/4 cup plus 1 tablespoon light brown sugar until glossy. The warmth helps dissolve sugar crystals, which creates a shinier, chewier final texture. Step 3: Add eggs and peppermint Allow the butter-sugar mix to cool slightly, then whisk in the two room-temperature eggs one at a time, beating until smooth. Stir in 3/4 teaspoon peppermint extract. Mixing while slightly warm helps the eggs incorporate without scrambling. Step 4: Sift and add dry ingredients Sift together 3/4 cup all-purpose flour, 3/4 cup cocoa powder, 1 tablespoon cornstarch, 1/2 teaspoon baking powder, and 3/4 teaspoon espresso powder if using. Sifting eliminates lumps and evenly distributes the baking powder and cornstarch. Step 5: Combine batter and fold in chocolate Fold the dry mix into the wet ingredients with a rubber spatula until just combined; do not overmix or the brownies will toughen. Fold in 1/2 cup chocolate chips or chunks so they are evenly distributed but the batter still looks glossy. Step 6: Bake and cool Spread the batter into the prepared pan and smooth the top. Bake for 20–25 minutes at 350°F (175°C). Start checking at 18 minutes — you want a slight wobble in the center and a firm top. Let cool completely in the pan on a rack before lifting out with the parchment and cutting into 9 or 12 squares.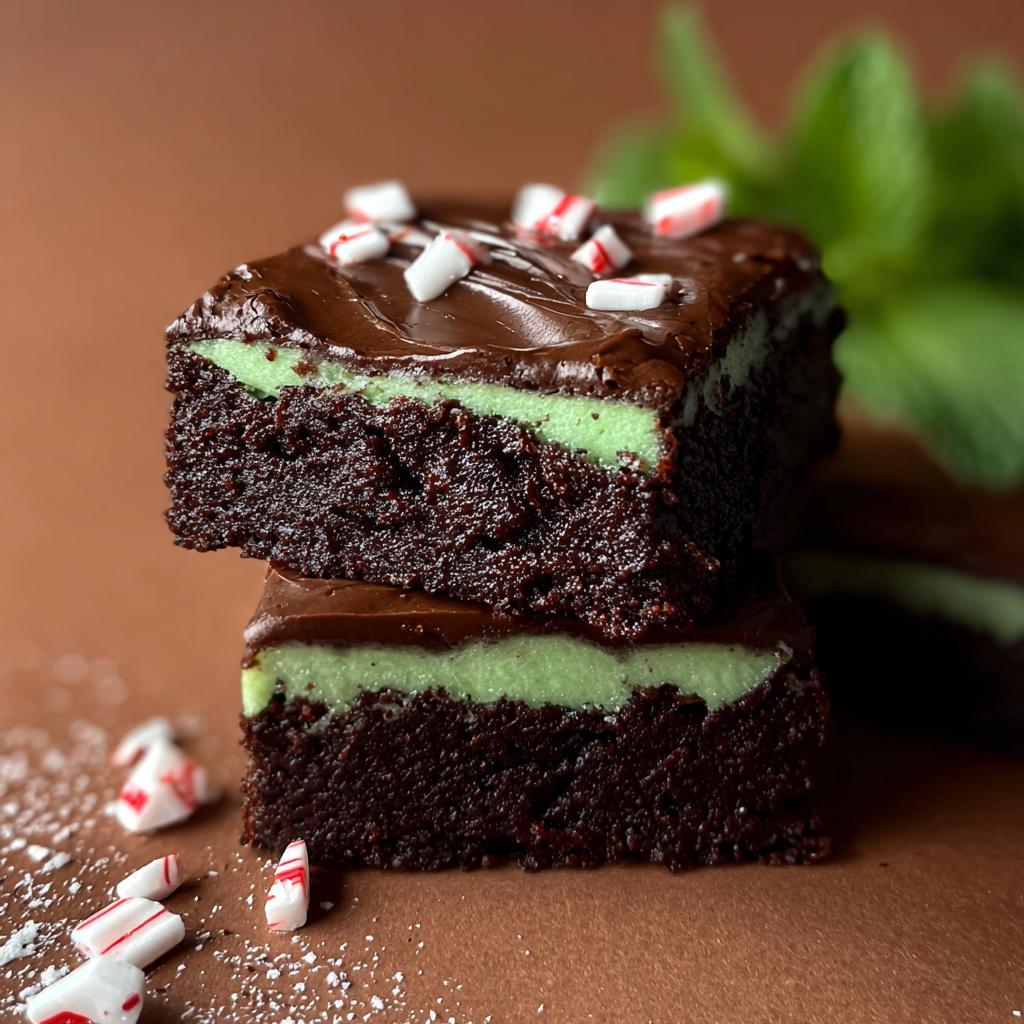
You Must Know
- Store cooled squares in an airtight container at room temperature for up to 3 days or refrigerate for up to 7 days.
- Freeze wrapped squares for up to 3 months; thaw at room temperature for 30–60 minutes before serving.
- These brownies are moderate in calories and rich in cocoa; a typical square is roughly 220–260 calories depending on portion size.
- Allergens: contains eggs, dairy (from butter and possibly chocolate chips), and gluten; choose alternatives to accommodate restrictions.
- For a more intense chocolate profile, use chopped dark chocolate instead of chips and reduce sugar by 1 tablespoon if you prefer less sweetness.
My favorite part of these brownies is the contrast: a silky, deep chocolate base with a crisp top and a mint lift that brightens each bite. I often bring them to potlucks because they travel well and rarely come home — people tend to hover near the dessert table until the pan is empty. Over the years I’ve learned to label them clearly so the peppermint fans can find them first.
Storage Tips
To maintain texture, cool the brownies completely before storing. Room-temperature storage in a tightly sealed container keeps them soft for 2–3 days; for longer life, refrigerate up to a week. For freezing, wrap individual squares in plastic wrap, then foil, and place in a freezer-safe bag. Thaw at room temperature for 30–60 minutes or microwave gently for 10–15 seconds if you want them warm. Avoid storing near strongly scented foods as chocolate absorbs odors.
Ingredient Substitutions
If you need dairy-free options, swap melted salted butter for an equal measure of vegan butter or refined coconut oil; note coconut will impart a mild coconut note. For egg-free baking, two tablespoons of ground flaxseed mixed with 6 tablespoons water (let sit 5 minutes) can replace two eggs, but expect a slightly denser crumb. Use gluten-free all-purpose flour cup-for-cup to make them gluten-free. If peppermint extract is unavailable, 1/4 cup finely crushed peppermint candies folded in at the end can provide mint flavor and texture.
Serving Suggestions
Serve squares plain for a classic bite, or add a dusting of powdered sugar for a frosted look. For a party dessert plate, pair with whipped cream, a drizzle of chocolate sauce, or a scoop of vanilla bean ice cream. Garnish with fresh mint leaves or crushed candy cane for seasonal flair. These are ideal with hot drinks — peppermint tea, coffee, or hot chocolate — balancing sweetness and richness beautifully.
Cultural Background
The chocolate-and-mint combination has long been popular in Western confections, from vintage after-dinner mints to modern candies. Brownies themselves originated in late 19th-century America as an adaptable, single-pan treat. Combining peppermint with a fudgy base taps into holiday traditions where mint flavors signify winter freshness. Regional variations swap in peppermint oil, crushed peppermint, or flavored ganaches to create distinct textures and intensities.
Seasonal Adaptations
For winter holidays, top squares with crushed candy cane or a thin peppermint glaze. In spring, replace peppermint with 3/4 teaspoon orange extract for a chocolate-orange version. For a summer picnic, fold in 1/2 cup chopped fresh strawberries and omit peppermint. You can also add a tablespoon of toasted nuts for autumnal crunch and aroma.
Meal Prep Tips
These squares are excellent for make-ahead dessert trays. Bake and cool, then slice and layer between parchment in an airtight container. Pack portions in single-serve boxes for lunches or gifting. If you plan to freeze, flash-freeze on a tray for 30 minutes before wrapping to prevent sticking. Reheat individual portions in a microwave for 10–15 seconds to revive that freshly-baked feel.
These mint brownies are simple to make, reliably delicious, and endlessly adaptable — a small pan that brings a lot of joy. I hope you make them, share them, and find your own little tweaks that make them uniquely yours.
Pro Tips
Measure flour by spooning into the cup and leveling to avoid dry, cakey results.
Cool completely before cutting to get clean edges; chilling for 20 minutes helps if you’re in a hurry.
Start with 3/4 teaspoon peppermint extract and adjust in future batches rather than adding too much on the first try.
Use high-quality cocoa for better depth; if possible, sift cocoa to remove lumps.
This nourishing mint brownies recipe is sure to be a staple in your kitchen. Enjoy every moist, high protein slice — it is perfect for breakfast or as a wholesome snack any time.
FAQs about Recipes
Should the eggs be room temperature?
Yes. Room-temperature eggs mix into the warm butter more smoothly and give you a better, more even texture.
How do I know when the brownies are done?
Bake until a slight jiggle remains in the center and a toothpick comes out with moist crumbs; this preserves fudginess.
Tags
Mint Brownies
This Mint Brownies recipe makes perfectly juicy, tender, and flavorful steak every time! Serve with potatoes and a side salad for an unforgettable dinner in under 30 minutes.
Ingredients
Brownie batter
Instructions
Preheat and prepare the pan
Preheat oven to 350°F (175°C). Line an 8x8-inch pan with parchment paper and grease lightly so the paper stays in place.
Melt butter and combine with sugar
Melt 1/2 cup salted butter and whisk in 3/4 cup plus 1 tablespoon light brown sugar until glossy and slightly cooled.
Add eggs and peppermint
Whisk in 2 room-temperature eggs one at a time, then stir in 3/4 teaspoon peppermint extract until smooth.
Sift dry ingredients
Sift together 3/4 cup all-purpose flour, 3/4 cup cocoa powder, 1 tablespoon cornstarch, 1/2 teaspoon baking powder, and 3/4 teaspoon espresso powder if using.
Combine batter and fold in chocolate
Fold dry mix into the wet ingredients until just combined, then fold in 1/2 cup chocolate chips or chunks.
Bake and cool
Spread batter in the prepared pan and bake at 350°F (175°C) for 20–25 minutes until a slight jiggle remains. Cool completely before slicing.
Last Step: Please leave a rating and comment letting us know how you liked this recipe! This helps our business to thrive and continue providing free, high-quality recipes for you.
Nutrition
Did You Make This?
Leave a comment & rating below or tag
@festive-cooks on social media!
Categories:
You might also like...

Air Fryer Apple Fries
Crispy, cinnamon-sugar coated apple fries made in the air fryer — a quick, family-friendly snack or dessert ready in under 30 minutes.

Air Fryer Bacon Cheese Croissants
Golden, flaky croissants filled with ham, melted cheddar and Swiss, finished with a glossy egg wash and cooked in the air fryer for quick, crowd pleasing results.

Air Fryer Bang Bang Cauliflower
Crispy air fryer cauliflower tossed in a creamy sweet-spicy bang bang sauce for a crowd-pleasing, quick appetizer or weeknight treat.
Did You Make This?
Leave a comment & rating below or tag @festive-cooks on social media!
Rate This Recipe
Share This Recipe
Enjoyed this recipe? Share it with friends and family, and don't forget to leave a review!
Comments (1)
This recipe looks amazing! Can't wait to try it.
Comments are stored locally in your browser. Server comments are displayed alongside your local comments.

Hi, I'm Jessica!
What's Popular

30-Minute Meals!
Join to receive our email series which contains a round-up of some of our quick and easy family favorite recipes.