
Christmas Cookie Bars

A festive tray of chewy, buttery cookie bars studded with chocolate, optional nuts, and colorful sprinkles—easy to make and perfect for holiday sharing.

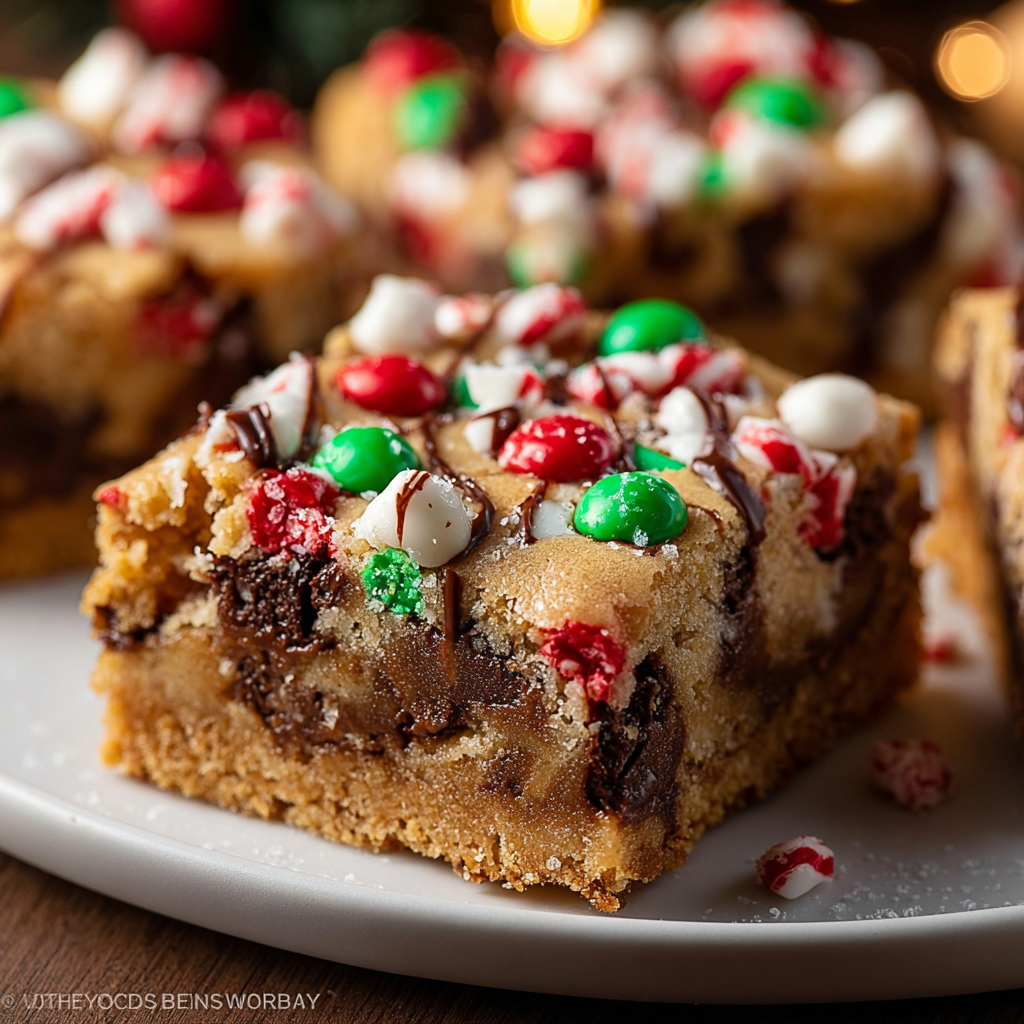
This pan of Christmas Cookie Bars has been a holiday anchor in my kitchen for years. I first developed this version the winter my oven conspired to make every cookie I baked spread too thin; instead of fighting the problem I embraced it, transforming my go-to chocolate chip dough into a thick, chewy slab that slices beautifully and travels well. The result is a buttery, tender interior with crisped edges, pockets of melted chocolate, and a playful sprinkle crunch on top. It’s the sort of dessert that invites conversation—people reach for a bar, taste it, and half a dozen explanations about family traditions and tweaks fly across the table.
What I love about these bars is how reliably festive they feel with minimal fuss. They take the familiar, comforting flavors of a classic cookie—butter, brown sugar, vanilla, chocolate—and present them in a format that’s easy to portion for cookie swaps, potlucks, or an after-dinner sweet. I often make a double batch in late November, freezing half ready to slice later; on busy December afternoons, a quick thaw and a dusting of extra sprinkles makes a tray that looks like you worked for hours. The texture is intentionally soft and chewy rather than cakey, and the sprinkle-topped finish gives a holiday sparkle that kids and adults both adore.
Why You'll Love This Recipe
- Simple, pantry-friendly ingredients—most of which you probably already have—come together in about 15 minutes hands-on and 25 minutes in the oven.
- Sheet-pan format saves time: one bowl, one pan, no scooping dozens of cookies, and easy cleanup when you line the pan with parchment.
- Versatile: keep it classic with chocolate chips, add nuts for crunch, or swap in seasonal chips (peppermint or white chocolate) to match your celebration.
- Travel-friendly and gift-ready—bars slice neatly, stack well in tins, and resist breakage during transport.
- Make-ahead friendly: freeze whole slab or individual bars; thaw at room temperature and freshen in a low oven if desired.
Every year I bring these to a neighborhood cookie exchange and they disappear first. One December, my neighbor declared them the new family tradition and asked for the recipe on the spot—so now I hand out both bars and printed notes. The sprinkle trick came from a joyful experiment with my kids; they were delighted to press the colorful bits into the warm top and that quick ritual somehow declares the cookies ready for the holidays.
Ingredients
- Unsalted butter (1 cup / 2 sticks): Use real butter—not margarine—for flavor and texture. If your butter is salted, reduce kitchen salt slightly. I prefer European-style butter for a richer taste, but standard grocery butter works fine.
- Granulated sugar (1 cup): Adds sweetness and helps the edges crisp. For a slightly more caramel note, you can substitute half with superfine sugar for faster dissolution.
- Brown sugar, packed (1 cup): The moisture and molasses in brown sugar are essential for chewiness; light brown sugar gives a balanced flavor, dark brown deepens the molasses character.
- Large eggs (2): Bind and enrich the dough. Use room temperature eggs for better emulsification and consistent texture.
- Vanilla extract (2 teaspoons): A good-quality vanilla (Mexican or Madagascar) elevates the flavor more than additional sugar. Avoid imitation vanilla if possible.
- All-purpose flour (3 cups): Provides structure. Spoon and level your cups or weigh if you prefer precision; 3 cups spooned and leveled yields the intended texture.
- Baking powder (1 teaspoon) and baking soda (1 teaspoon): The combination gives a gentle lift while maintaining density—baking soda helps with spread and browning.
- Salt (1/2 teaspoon): Enhances sweetness and rounds the flavors. Increase if you used unsalted butter and prefer a more pronounced contrast.
- Chocolate chips (2 cups): Semi-sweet or a mix of semi-sweet and milk chips works beautifully; chopped chocolate bars add pools of molten chocolate for a slightly more gourmet result.
- Chopped nuts (1 cup, optional): Walnuts or pecans add toasty crunch—toast them lightly in a dry skillet for extra depth.
- Festive sprinkles (1/2 cup): Pressed on before the bars finish baking, they give a cheerful finish; choose heat-stable sprinkles to avoid excessive melting.
Instructions
Prepare the pan and preheat: Preheat the oven to 350°F. Line a 9x13-inch baking pan with parchment, leaving a 1-inch overhang for easy lifting. This pan size yields 12 generous bars; for thinner bars use a quarter-sheet pan but reduce baking time by 3–5 minutes. Cream butter and sugars: In a large bowl, beat 1 cup softened unsalted butter with 1 cup granulated sugar and 1 cup packed brown sugar until light and fluffy, about 2–3 minutes with an electric mixer on medium. Scrape the bowl so no pockets of unmixed butter remain—this ensures even texture. Add eggs and vanilla: Add 2 large eggs one at a time, beating well after each addition, then mix in 2 teaspoons vanilla extract. The mixture should look glossy and slightly aerated; this helps with a tender crumb. Combine dry ingredients: In a separate bowl whisk together 3 cups all-purpose flour, 1 teaspoon baking powder, 1 teaspoon baking soda, and 1/2 teaspoon salt. Sift only if your flour is lumpy. Fold dry into wet: Add the dry mix to the butter mixture in two additions, gently folding until just combined. Overmixing develops gluten and can toughen the bars—stop when no white streaks of flour remain. Mix-ins and press: Fold in 2 cups chocolate chips and 1 cup chopped nuts if using, reserving a small handful of chips for the top. Spread the dough evenly into the prepared pan using an offset spatula; press the reserved chips and 1/2 cup sprinkles into the surface so they stay visible after baking. Bake and test: Bake at 350°F for 22–28 minutes. The center should be set but still slightly soft when you jiggle the pan; edges should be golden. A toothpick inserted near the center will show a few moist crumbs—not wet batter. For a chewier center, err on the lower end of the time range. Cool and slice: Cool in the pan on a rack for at least 30 minutes so the bars firm up. Use the parchment overhang to lift the slab from the pan and transfer to a cutting board. Slice into 12 bars with a serrated knife, cleaning the blade between cuts for neat edges.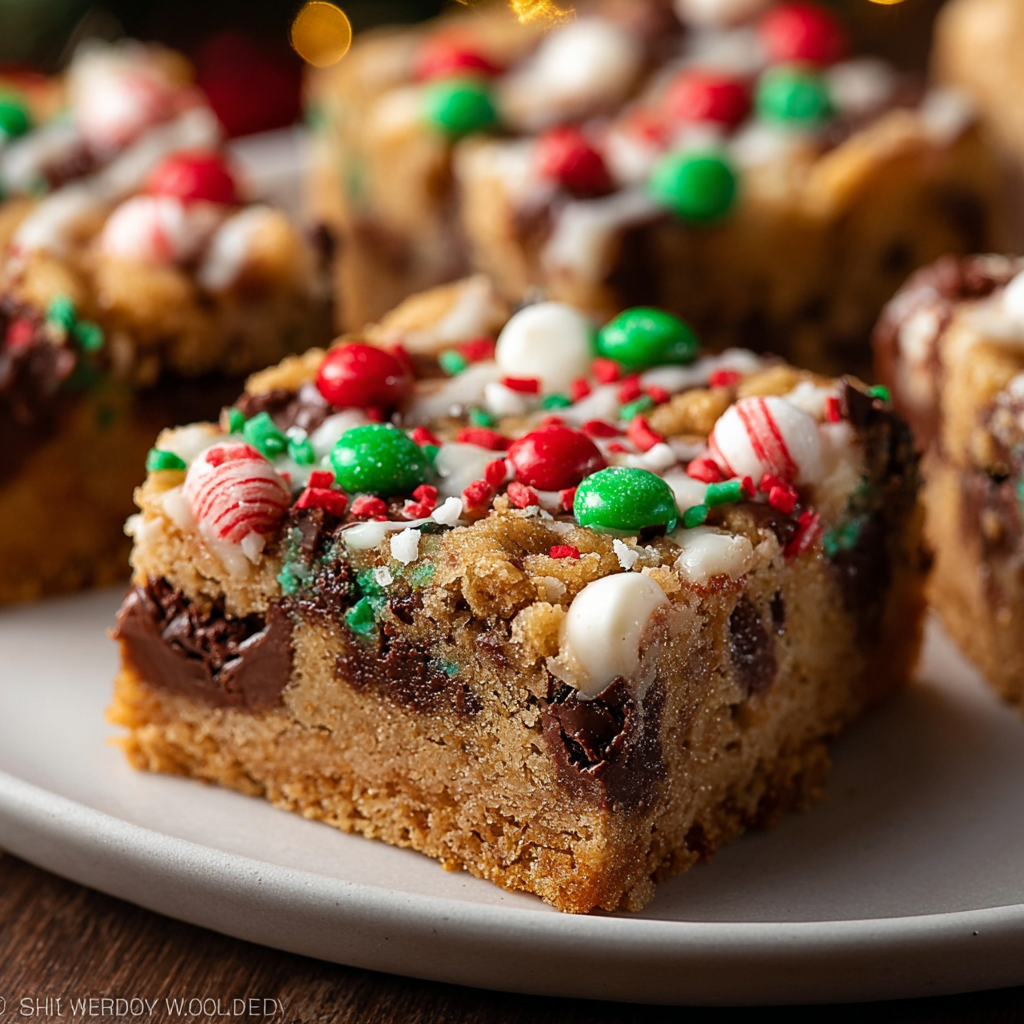
You Must Know
- These bars are best stored at room temperature in an airtight container for up to 3 days; refrigerate up to 7 days or freeze for 2–3 months.
- They are moderately high in calories—perfect for sharing and portion control; one bar is a satisfying treat after a holiday meal.
- To preserve sprinkle color and texture, press sprinkles into the surface before baking instead of scattering them on hot bars afterward.
- Bars slice cleaner when cooled completely; warm bars will be very soft and may crumble.
My favorite part is how forgiving this formula is. Once I learned to avoid overmixing and to trust the dough’s thickness, I stopped fretting about oven variances. The bars travel well in a single layer and make a beautiful, informal gift when wrapped with parchment and tied with twine—neighbors always appreciate a tray left on the doorstep on a chilly morning.
Storage Tips
Store cooled bars in an airtight container with parchment layers to prevent sticking. At room temperature they keep for 2–3 days; refrigeration extends life to about a week but can firm the texture—bring to room temperature before serving to soften. For longer storage, wrap the whole slab tightly in plastic wrap and then foil; freeze up to 3 months. To revive frozen bars, thaw in the refrigerator overnight and then warm briefly in a 300°F oven for 6–8 minutes to refresh the top and melt any hardened chips slightly.
Ingredient Substitutions
Swap brown sugar for coconut sugar for a deeper, almost caramel-like note, though the color will darken. To make dairy-free, use a firm vegan butter and dairy-free chocolate chips—texture will be slightly different but still delicious. For gluten-free, replace all-purpose flour with a 1-to-1 gluten-free blend that includes xanthan gum; expect minor differences in chew. Omit nuts for nut-free gatherings and increase chocolate chips by 1/2 cup if desired.
Serving Suggestions
Serve these bars slightly warm with a scoop of vanilla ice cream for an indulgent holiday dessert, or present them with espresso or mulled wine for an adult gathering. For a festive platter, alternate sprinkle colors and dust with a light sift of powdered sugar. They also work well boxed with other treats—slice into smaller squares for a cookie-swap-friendly bite-size version.
Cultural Background
Bar-style cookies are an American comfort-food tradition that simplifies individual cookie baking into a single-pan approach—think blondies, brownies, and seven-layer bars. They became popular for their efficiency during large gatherings and potlucks. These Christmas Cookie Bars channel classic American flavors—brown sugar, butter, and chocolate—while the sprinkle decoration nods to celebratory, family-centered baking rituals common to holiday baking across the United States.
Seasonal Adaptations
In winter swap in peppermint chips or add 1/2 teaspoon peppermint extract for a holiday twist; top with crushed candy canes after cooling for a festive crunch. For spring, substitute pastel sprinkles and white chocolate; in autumn stir in 1 teaspoon cinnamon and chopped dried cranberries for a spiced bar. These small changes shift the bars’ character while preserving the core texture that makes them so appealing year-round.
Meal Prep Tips
Prepare the dough a day ahead and refrigerate, tightly wrapped, for up to 24 hours—bring to room temperature before spreading in the pan. If making multiple trays, par-bake one batch slightly less than the recommended time and finish baking just before serving to keep them freshly crisped. Label frozen slabs with date and contents and slice only after thawing to retain tidy edges.
These bars are a holiday staple that rewards simple care—mix, press, bake, and share. Whether you’re packing tins for neighbors or tucking a few into lunchboxes, the bright sprinkles and warm chocolate make everyday moments feel celebratory. I hope this becomes one of those recipes you reach for when the calendar fills up and you need a reliable, joyful sweet.
Pro Tips
Use room-temperature eggs and butter for smoother emulsification and even texture.
Line the pan with parchment for easy removal and neater slicing.
Reserve a handful of chips and sprinkles to press on top so the bars look polished after baking.
Avoid overmixing the dough once the flour is added to prevent toughness.
This nourishing christmas cookie bars recipe is sure to be a staple in your kitchen. Enjoy every moist, high protein slice — it is perfect for breakfast or as a wholesome snack any time.
Tags
Christmas Cookie Bars
This Christmas Cookie Bars recipe makes perfectly juicy, tender, and flavorful steak every time! Serve with potatoes and a side salad for an unforgettable dinner in under 30 minutes.
Ingredients
Base
Dry
Mix-ins & Topping
Instructions
Prepare the pan and preheat
Preheat oven to 350°F. Line a 9x13-inch baking pan with parchment paper, leaving an overhang to lift the bars out later.
Cream butter and sugars
Beat 1 cup softened unsalted butter with 1 cup granulated sugar and 1 cup packed brown sugar until light and fluffy, about 2–3 minutes. Scrape the bowl to ensure even mixing.
Add eggs and vanilla
Add 2 room-temperature large eggs one at a time, mixing thoroughly after each addition, then stir in 2 teaspoons vanilla extract until glossy.
Combine dry ingredients
Whisk together 3 cups all-purpose flour, 1 teaspoon baking powder, 1 teaspoon baking soda, and 1/2 teaspoon salt in a separate bowl.
Fold dry into wet
Add the dry mix to the butter mixture in two additions, folding gently until just combined—avoid overmixing to keep the bars tender.
Add mix-ins and press
Fold in 2 cups chocolate chips and 1 cup chopped nuts if using. Spread the dough evenly into the prepared pan and press reserved chips and 1/2 cup sprinkles into the surface.
Bake and cool
Bake at 350°F for 22–28 minutes until edges are golden and the center is set but slightly soft. Cool in the pan for at least 30 minutes before lifting out and slicing into 12 bars.
Last Step: Please leave a rating and comment letting us know how you liked this recipe! This helps our business to thrive and continue providing free, high-quality recipes for you.
Nutrition
Did You Make This?
Leave a comment & rating below or tag
@festive-cooks on social media!
Categories:
You might also like...

Air Fryer Bang Bang Cauliflower
Crispy air fryer cauliflower tossed in a creamy sweet-spicy bang bang sauce for a crowd-pleasing, quick appetizer or weeknight treat.

Air Fryer Buffalo Cauliflower
Crispy battered cauliflower florets tossed in a tangy buffalo sauce, ready in the air fryer for a spicy, crowd pleasing snack or light meal.

Air Fryer Honey Butter Garlic Chicken
Crispy, juicy chicken tossed in a glossy honey-butter-garlic glaze — ready in minutes with an air fryer for an easy weeknight favorite.
Did You Make This?
Leave a comment & rating below or tag @festive-cooks on social media!
Rate This Recipe
Share This Recipe
Enjoyed this recipe? Share it with friends and family, and don't forget to leave a review!
Comments (1)
This recipe looks amazing! Can't wait to try it.
Comments are stored locally in your browser. Server comments are displayed alongside your local comments.

Hi, I'm Jessica!
What's Popular

30-Minute Meals!
Join to receive our email series which contains a round-up of some of our quick and easy family favorite recipes.