
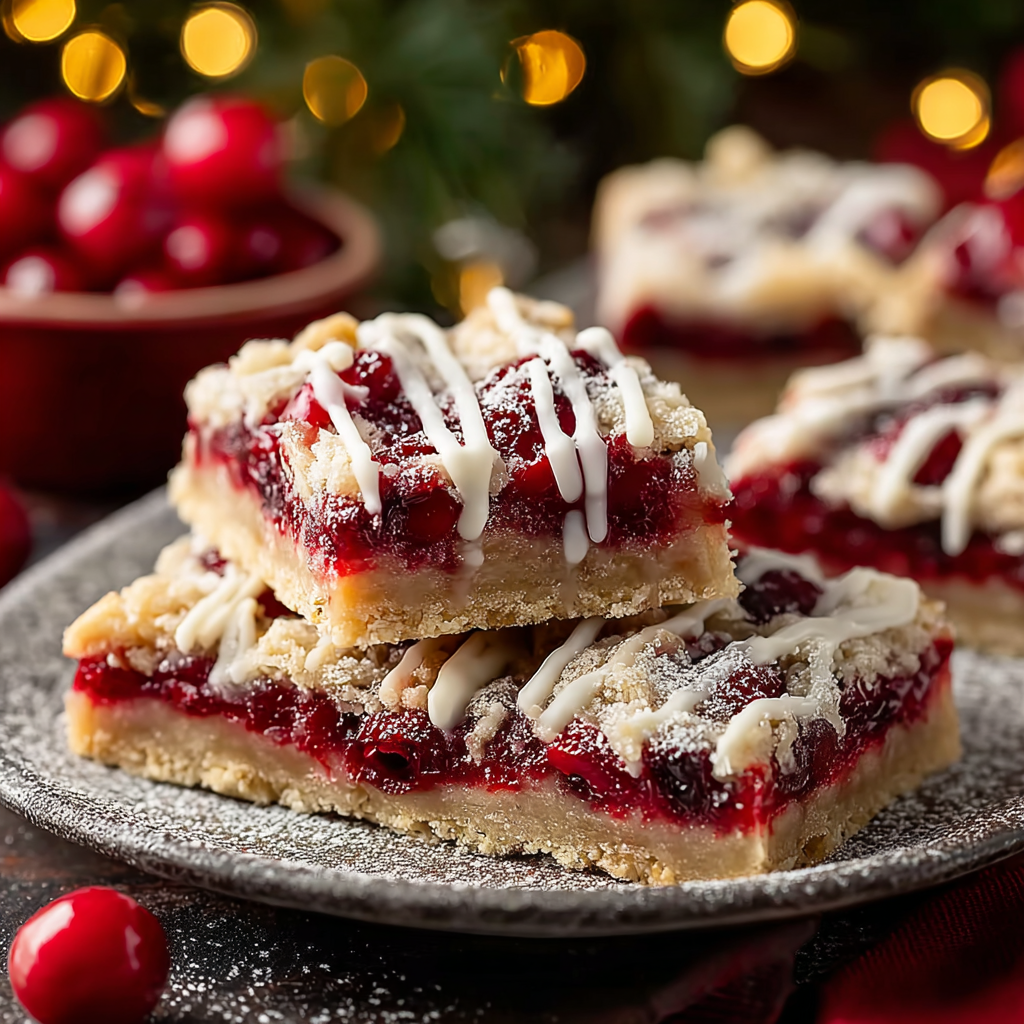
Christmas Cherry Bars

Buttery shortbread topped with tart dried cherries and sweet white chocolate—perfect for holiday gifting and cozy gatherings.
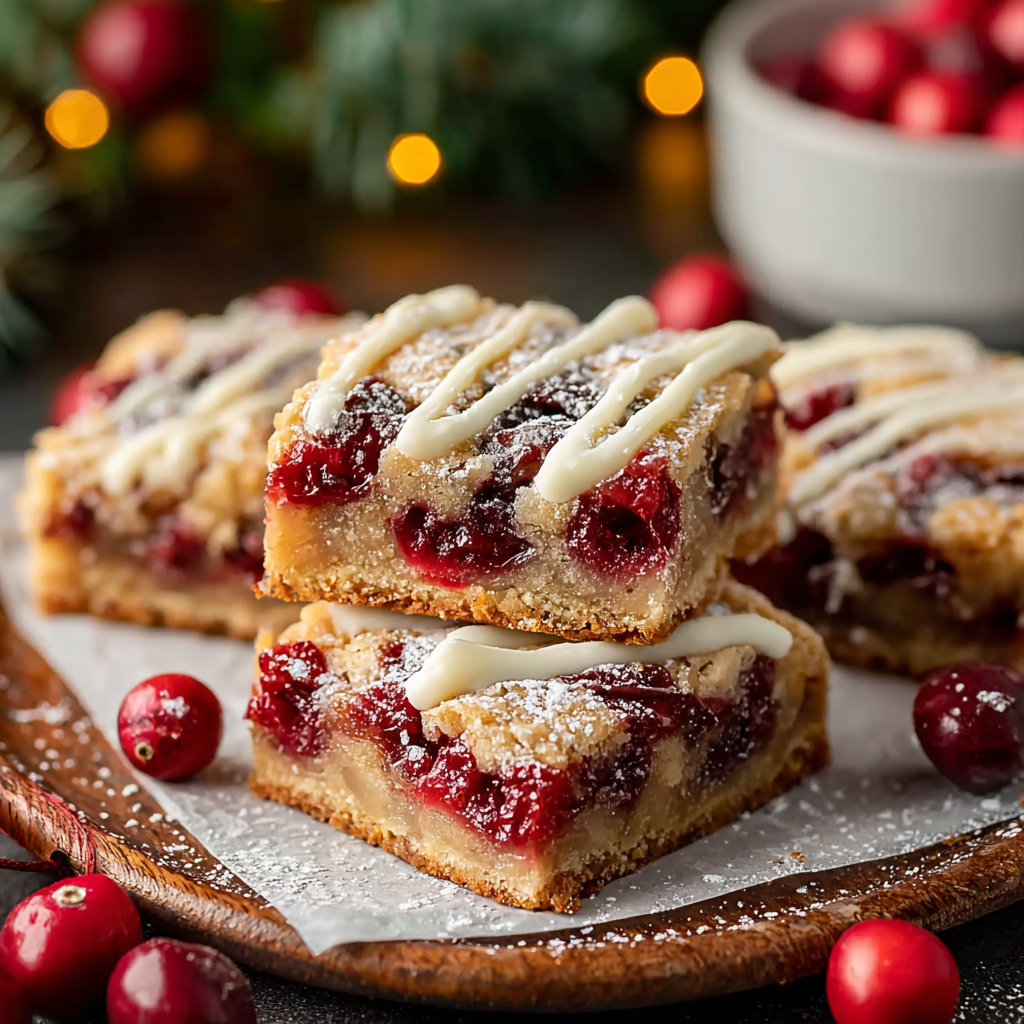
This batch of Christmas Cherry Bars arrived in my life the way many holiday favorites do: by accident and then immediately by insistence. I first mixed these together during a blustery December afternoon when the pantry offered only a few staples—flour, a stick of butter, a jar of dried cherries left from last year, and a bag of white chocolate chips hiding on the top shelf. The very first pan disappeared within hours and the recipe became our seasonal staple. The bars balance a tender, buttery shortbread base with bright, tart cherries and pockets of creamy white chocolate. The texture is everything I look for at this time of year: a slightly crumbly base that still holds together, a chewy fruit layer, and little molten chips that give both sweetness and a silky mouthfeel.
What makes these particularly special is how reliably they travel well and please a crowd. I’ve wrapped batches for neighbors, trimmed a few into petite squares for cookie platters, and served them warm with coffee on Christmas morning. They’re forgiving to make, adaptable to swaps, and bring back memories because the first time I handed a plate to a friend she closed her eyes and declared them “like holiday sunshine.” If you have a quiet hour and a baking pan, this recipe will deliver that warm, festive comfort in no time.
Why You'll Love This Recipe
- Ready in about an hour from start to finish: a quick base bake, a simple topping, and a final bake—perfect for last-minute holiday baking.
- Uses pantry staples plus one jar of dried tart cherries and white chocolate chips, so you can pull this together even with a semi-stocked kitchen.
- Make-ahead friendly: cool completely, slice, and store—bars keep well for several days and freeze beautifully for gifting.
- Crowd-pleasing texture contrast: a shortbread-like crust, chewy fruit, and melted white chocolate add pockets of sweet richness.
- Flexible to dietary tweaks: swap extracts or chocolate to alter flavor; see substitutions below for allergy-friendly options.
My family’s reaction is always the best part. One year I doubled the batch for a holiday brunch and still ran out. I’ve started leaving a few squares on the counter purposely for guests who arrive early; it’s the most reliable way to ensure someone starts a conversation about childhood holidays and favorite sweets. Small, seasonal rituals like this are why I keep the dried cherries on my shelf all winter.
Ingredients
- All-purpose flour (1 1/2 cups): Look for unbleached all-purpose flour for the best shortbread texture; measure by spooning into the cup and leveling for accuracy. The flour gives structure without making the base tough—use brands like King Arthur or Pillsbury for consistent results.
- Granulated sugar (1/2 cup): Regular white sugar keeps the base crisp and lightly sweet. If you prefer a hint of caramel depth, substitute half with light brown sugar, but expect a slightly softer crumb.
- Unsalted butter (1/2 cup, chilled, cubed): Cold butter cut into small cubes is essential for a tender, flaky shortbread. European-style butter works well for richer flavor; chill it so you can cut it into the flour without melting.
- Baking powder (1/2 teaspoon) & pinch of salt: A small lift keeps the base from being too dense; salt balances sweetness—use fine sea salt or kosher salt measured carefully.
- Large egg yolk (1): The yolk enriches and binds the dough while keeping the crumb tender. Reserve the white for another use—add it to a smoothie or meringue.
- Vanilla extract (1/2 teaspoon) & almond extract (1/4 teaspoon): The combo gives warm, aromatic notes that complement cherries; use pure extracts for the cleanest flavor.
- Dried tart cherries (1 cup, roughly chopped): Choose tart/unsweetened dried cherries if possible to provide a bright contrast; chopped evenly so each bite gets fruit.
- White chocolate chips (1/2 cup): Look for good-quality chips or chopped couverture if you want creamier pockets of chocolate. Semi-sweet or dark can be used, but white chocolate is traditional here.
Instructions
Prepare the pan and oven: Preheat the oven to 350°F (175°C). Lightly grease an 8×8-inch pan or line it with parchment paper with an overhang—this makes lifting the bars out effortless. Ensuring the pan is ready before you mix will keep the workflow smooth. Make the dry mix: In a medium bowl, whisk the flour, sugar, baking powder, and salt until evenly combined. This step distributes the leavening and salt, preventing salty or puffy pockets and ensuring a uniform base texture. Cut in the butter: Add chilled, cubed butter. Use a pastry cutter or your fingertips to work the butter into the dry ingredients until the mixture resembles coarse crumbs—pea-sized pieces are ideal. Keep the butter cool so the dough stays slightly flaky rather than greasy. Bind with yolk and extracts: Stir in the egg yolk, vanilla, and almond extracts. Mix until a soft dough forms; it may be a bit crumbly but should hold together when pressed. If it’s too dry, add a teaspoon of cold water until it comes together. Form the base: Reserve about one-third of the dough for the topping. Press the remaining dough evenly into the prepared pan to form a compact base. Use the bottom of a measuring cup to smooth and compress for an even bake. Par-bake the crust: Bake the crust for 10 to 12 minutes, until the edges are set but the center remains pale. This step prevents a soggy middle once the cherries and chips are added; watch closely so it doesn’t brown too much. Assemble the filling and topping: Toss the dried cherries and white chocolate chips in a small bowl so they’re evenly distributed. Sprinkle this mixture across the warm crust. Then crumble the reserved dough over the cherries so bits of filling peek through—this gives a pretty, rustic appearance. Final bake and cool: Return the pan to the oven and bake another 20 to 25 minutes, until the top is golden and the filling bubbles slightly. Remove and cool completely on a wire rack before lifting from the pan and slicing into squares or rectangles.
You Must Know
- The bars freeze well for up to 3 months—wrap tightly in plastic and thaw in the fridge overnight before slicing.
- Because drying concentrates sugars, dried cherries add chewy tartness; if using sweetened cherries, reduce the white chocolate slightly to avoid excessive sweetness.
- Store at room temperature in an airtight container for up to 3 days; refrigerate up to a week, though the base will firm up when cold.
- High in energy for a small square—these are single-served treats rather than light snacks.
My favorite part is how the kitchen smells while they bake: butter and vanilla that instantly make any house feel like a holiday home. I’ve learned to cut them into uneven squares for a homey look; perfectly uniform bars are nice, but the irregularity invites people to reach in and try one without thinking too much.
Storage Tips
To preserve texture, cool completely before storing. At room temperature, place squares in a single layer or separate layers with parchment to avoid sticking; they’ll keep up to 3 days. For longer storage, freeze on a tray until firm, then pack in a freezer-safe container with parchment between layers—use within 3 months. Reheat briefly (10–15 seconds in a microwave) for a warm, softer bite or let thaw in the fridge and come to room temperature before serving. Avoid sealing while still warm to prevent condensation and sogginess.
Ingredient Substitutions
If you need nut-free or allergy-friendly options, swap almond extract for extra vanilla. For dairy-free, replace butter with a firm vegetable-based spread measured 1:1 and choose dairy-free white chocolate or chopped dairy-free baking bars; texture will be slightly different but still delightful. To reduce sweetness, use semi-sweet chocolate chips instead of white. If you can’t find dried tart cherries, use dried cranberries but reduce any additional sugar or pair with slightly less sweet chocolate to maintain balance.
Serving Suggestions
Serve slightly warm with a dusting of powdered sugar for an elegant presentation. These bars pair beautifully with strong coffee, spiced tea, or a creamy hot chocolate. For a holiday platter, cut into small bite-sized pieces and arrange with biscotti and ginger snaps. Garnish with a few whole dried cherries or a sprinkle of chopped pistachios for color and crunch.
Cultural Background
Shortbread-style bases topped with fruit or chocolate are a longstanding tradition in many Western holiday baking cultures—think of fruit bars, linzer-inspired tarts, and classic crumbles. The idea of pairing tart dried fruit with white chocolate has become popular in recent decades as specialty dried fruits became more widely available. These bars marry that old-world shortbread comfort with modern pantry finds like dried cherries and chips, creating a festive cross between rustic and refined.
Seasonal Adaptations
In winter, swap cherries for chopped, dried cranberries and add a teaspoon of orange zest for a citrus lift. In summer, replace dried fruit with apricot or chopped dried strawberries and use dark chocolate to offset fruit sweetness. For a winter spiced version, add 1/2 teaspoon ground cinnamon and a pinch of nutmeg to the dry mix for seasonal warmth.
Meal Prep Tips
Prep the dough ahead and refrigerate for up to 48 hours; when ready, press into the pan and bake as directed. You can also freeze the dough in a block—thaw slightly before pressing into the pan. Portion the cooled bars into individual wrap for grab-and-go breakfasts or to pack with lunches. Use parchment overhang to lift out the slab cleanly, then slice with a warm, sharp knife for neat edges.
These Christmas Cherry Bars are the kind of recipe that disappears quickly and reappears at every family gathering. They’re simple, dependable, and small enough that you can bake a batch today and still have time to make another tomorrow. Share them, wrap them, or keep them all for yourself—either way, enjoy the little moments they create.
Pro Tips
Reserve one-third of the dough for the crumble top; pressing the rest evenly yields a stable base.
Use chilled butter and work quickly with your fingertips to keep some pea-sized butter pieces for flakier texture.
Toast chopped dried cherries in a warm oven for 3 minutes to intensify flavor before adding if they seem dry.
This nourishing christmas cherry bars recipe is sure to be a staple in your kitchen. Enjoy every moist, high protein slice — it is perfect for breakfast or as a wholesome snack any time.
FAQs about Recipes
Can I freeze these bars?
Yes. Cool completely, then wrap tightly in plastic and freeze for up to 3 months. Thaw overnight in the refrigerator before serving.
How do I get neat slices?
Use parchment overhang to lift the slab from the pan, then slice with a warm, sharp knife for cleaner edges.
Tags
Christmas Cherry Bars
This Christmas Cherry Bars recipe makes perfectly juicy, tender, and flavorful steak every time! Serve with potatoes and a side salad for an unforgettable dinner in under 30 minutes.
Instructions
Preheat and prepare pan
Preheat oven to 350°F (175°C). Grease an 8×8-inch pan or line with parchment leaving an overhang for easy removal.
Combine dry ingredients
Whisk together flour, sugar, baking powder, and salt in a medium bowl until evenly combined.
Cut in butter
Add chilled butter cubes and work them into the dry mix with a pastry cutter or fingertips until the mixture resembles coarse crumbs.
Add yolk and extracts
Stir in the egg yolk, vanilla, and almond extracts until a soft dough forms that holds when pressed; add a teaspoon of cold water if too dry.
Press base and reserve topping
Reserve one-third of the dough for the topping. Press the remainder evenly into the prepared pan to form the base.
Par-bake the crust
Bake the crust 10 to 12 minutes until edges are set but center is pale. Remove and let cool slightly.
Assemble filling and crumble
Toss cherries and white chocolate chips together and sprinkle over the warm crust. Crumble reserved dough over so the filling peek through.
Final bake and cool
Bake 20 to 25 minutes until top is golden and filling bubbles. Cool completely on a wire rack, lift out using parchment, and slice.
Last Step: Please leave a rating and comment letting us know how you liked this recipe! This helps our business to thrive and continue providing free, high-quality recipes for you.
Nutrition
Did You Make This?
Leave a comment & rating below or tag
@festive-cooks on social media!
Categories:
You might also like...

Air Fryer Bang Bang Cauliflower
Crispy air fryer cauliflower tossed in a creamy sweet-spicy bang bang sauce for a crowd-pleasing, quick appetizer or weeknight treat.

Air Fryer Buffalo Cauliflower
Crispy battered cauliflower florets tossed in a tangy buffalo sauce, ready in the air fryer for a spicy, crowd pleasing snack or light meal.

Air Fryer Honey Butter Garlic Chicken
Crispy, juicy chicken tossed in a glossy honey-butter-garlic glaze — ready in minutes with an air fryer for an easy weeknight favorite.
Did You Make This?
Leave a comment & rating below or tag @festive-cooks on social media!
Rate This Recipe
Share This Recipe
Enjoyed this recipe? Share it with friends and family, and don't forget to leave a review!
Comments (1)
This recipe looks amazing! Can't wait to try it.
Comments are stored locally in your browser. Server comments are displayed alongside your local comments.

Hi, I'm Jessica!
What's Popular

30-Minute Meals!
Join to receive our email series which contains a round-up of some of our quick and easy family favorite recipes.