
Chocolate Peppermint Cookie Cups

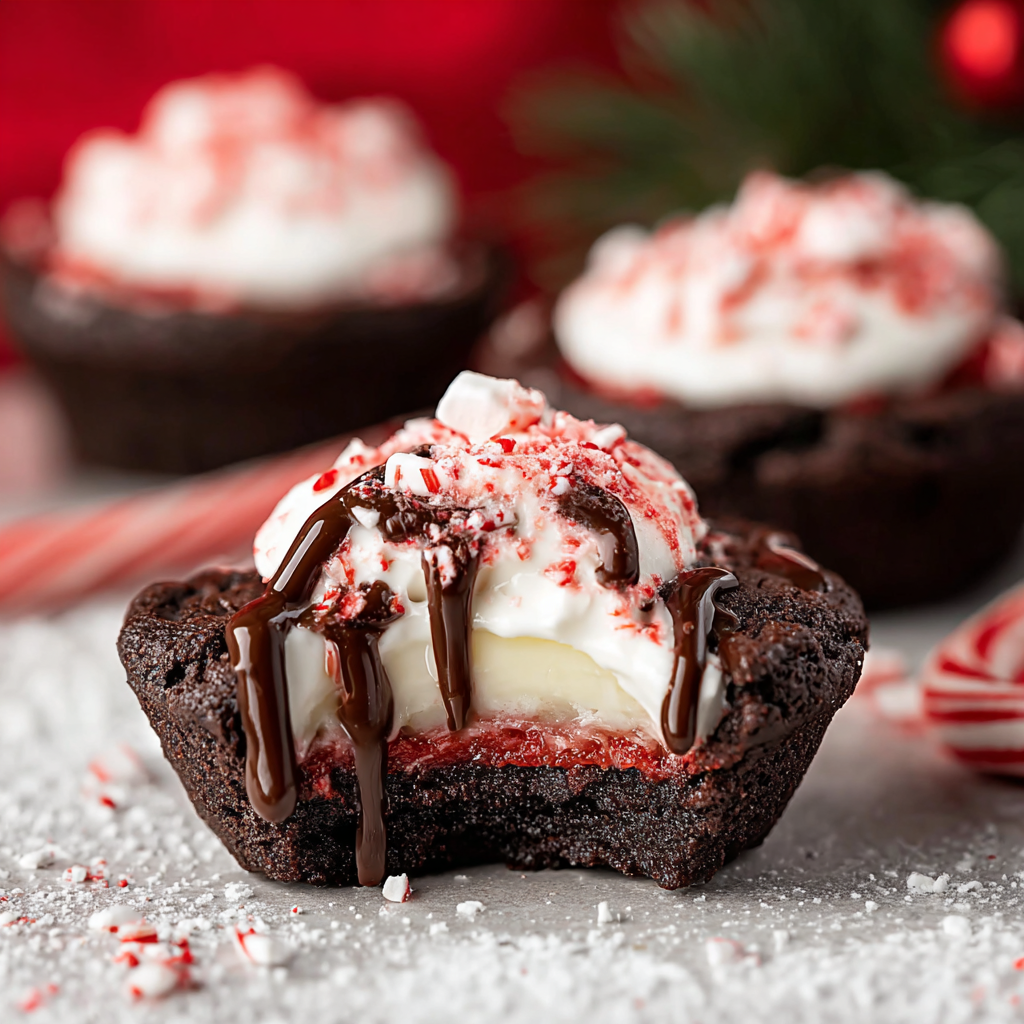
Deep chocolate cups filled with a bright peppermint cheesecake cream and crunchy candy cane topping — a festive, crowd-pleasing holiday treat.

This Chocolate Peppermint Cookie Cups creation arrived in my kitchen the year I decided holiday baking should be bold, not fussy. I was chasing the idea of a portable dessert that combined intense cocoa flavor with the cool, refreshing note of peppermint — something that felt indulgent but still bright enough to serve after a heavy winter meal. I first tried the combo at a cookie exchange and came home determined to capture that crisp chocolate edge with a soft, creamy peppermint center. The result: rich, slightly fudgy chocolate shells that hold a light peppermint cheesecake filling and a scattering of crushed candy cane for crunch.
I make these whenever friends come over for caroling or when the office needs something festive because they travel well and are easy to turn out in batches. The texture contrast — a slightly crisp outer rim, a tender cookie interior and a silk-smooth filling — is what makes these so memorable. They’re perfect for holiday cookie platters, gift tins, or a make-ahead dessert for a dinner party. Once you press the wells in the warm cookie cups and fill them with peppermint cream, people can’t resist picking one up.
Why You'll Love This Recipe
- Make-ahead friendly: the cookie cups can be baked and frozen for up to 3 months, and the peppermint filling keeps in the fridge for a few days, so you can assemble just before serving.
- Time-efficient: active hands-on time is about 25 minutes and each batch bakes in roughly 10–13 minutes, so you can produce a dozen or more in under an hour.
- Accessible ingredients: uses pantry staples — all-purpose flour, cocoa powders, butter, eggs — plus simple seasonal items like peppermint extract and candy canes.
- Crowd-pleasing flavor contrast: deep chocolate from Dutch and black cocoa paired with a bright peppermint cheesecake center offers an adult-friendly balance of richness and freshness.
- Portable and giftable: they fit in cookie tins or boxes, travel well, and are easy to decorate to match holiday colors.
In my experience these cups are always the first to go at parties. Family members repeatedly tell me they love the surprising peppermint cream — not too sweet, with just enough tang from the cream cheese to cut through the chocolate. I learned to press the wells while the cookies are still warm; that small step ensures a clean cup and a perfectly even rim every time.
Ingredients
- All-purpose flour (2 cups): Use a reliable, unbleached brand for consistent structure. Spoon and level into the cup for accurate measurement; this keeps the cookie cups tender instead of dense.
- Dutch-processed cocoa powder (1/4 cup) and black cocoa powder (1/4 cup): Dutch-processed offers mellow, chocolatey notes; black cocoa intensifies color and gives that nearly-black appearance. Brands like Valrhona or Hershey's Special Dark work well for different budgets.
- Baking soda (1 teaspoon) and salt (1/2 teaspoon): Baking soda provides a controlled lift and slight chew; salt enhances the cocoa and balances the sweetness.
- Unsalted butter (1 cup / 2 sticks, room temperature): Use full-fat butter for flavor and structure. Room-temp butter creams easily with the sugars, creating that light texture in the cookie walls.
- Granulated sugar (1/2 cup) and light brown sugar (1 cup, packed): Brown sugar contributes moisture and a subtle caramel undertone; the mix keeps the cups tender with a slight chew.
- Eggs (2 large, room temperature): Eggs add structure and emulsify the dough so the cups hold their shape but don’t become cakey.
- Vanilla extract (1 teaspoon): A small amount rounds out the cocoa’s acidity and complements the peppermint without competing.
- Peppermint cheesecake filling: Heavy whipping cream (1 cup, chilled), full-fat cream cheese (8 ounces), granulated sugar (1/2 cup), peppermint extract (1 teaspoon), red color gel (just a drop for swirl), and crushed candy canes for garnish. The chilled cream whips up fluffy and light, while full-fat cream cheese gives the filling tang and stability.
Instructions
Prepare the dry mix: Preheat the oven to 350°F. In a bowl whisk together 2 cups all-purpose flour, 1/4 cup Dutch-processed cocoa, 1/4 cup black cocoa, 1 teaspoon baking soda, and 1/2 teaspoon salt until uniform. Sifting the cocoa powders avoids lumps and ensures even color and flavor distribution (about 2–3 minutes). Cream butter and sugars: In a stand mixer fitted with a paddle or using a hand mixer, beat 1 cup (2 sticks) room-temperature unsalted butter with 1/2 cup granulated sugar and 1 cup packed light brown sugar on medium-high speed until light and fluffy, about 2–3 minutes. Scrape the bowl to avoid pockets of unmixed butter — proper creaming traps air for a tender texture. Incorporate eggs and vanilla: Reduce speed to low and add eggs one at a time, beating until each is incorporated. Add 1 teaspoon vanilla extract and mix until combined. Overbeating after adding flour can develop gluten and toughen the cups, so keep mixing gentle once dry ingredients go in. Add dry ingredients: With the mixer on low, add the flour-cocoa mixture and mix until just combined. The dough will be slightly dense and glossy — avoid overmixing. If it seems too soft to hold shape, refrigerate briefly (10–15 minutes) to firm it. Scoop into tins: Grease two regular-sized cupcake pans with cooking spray or butter. Using a large cookie scoop (3 tablespoons) drop mounds of dough into each cup, spacing evenly. The scoop size gives you uniform cups that will bake consistently. Bake and form wells: Bake in the preheated 350°F oven for 10–13 minutes — watch for edges that look set while the center remains slightly soft. Immediately after removing the pans from the oven, press the center of each warm cookie with a small jar or similarly sized round container to create a well. Press firmly and hold for a few seconds so the cup retains its shape as it cools. Cool and release: Allow cups to cool in the pans for 10 minutes. Loosen each by twisting slightly with a butter knife if needed, then remove and transfer to a wire rack to cool completely for another 5–10 minutes before filling. Cooling completely prevents the filling from melting into the cookie walls. Make the peppermint filling: Chill the mixing bowl and whisk attachment for the whipped cream. Beat 1 cup chilled heavy whipping cream to soft peaks. In a separate bowl, beat 8 ounces room-temperature cream cheese with 1/2 cup granulated sugar until smooth. Fold the whipped cream gently into the cream cheese mixture, then stir in 1 teaspoon peppermint extract. Add a tiny drop of red color gel and ripple with a spoon for a festive touch — a little color goes a long way. Assemble and garnish: Pipe or spoon the peppermint cheesecake filling into each cooled chocolate cup. Sprinkle with finely chopped candy canes for crunch and an extra peppermint hit. Chill assembled cups for at least 30 minutes to set the filling before serving.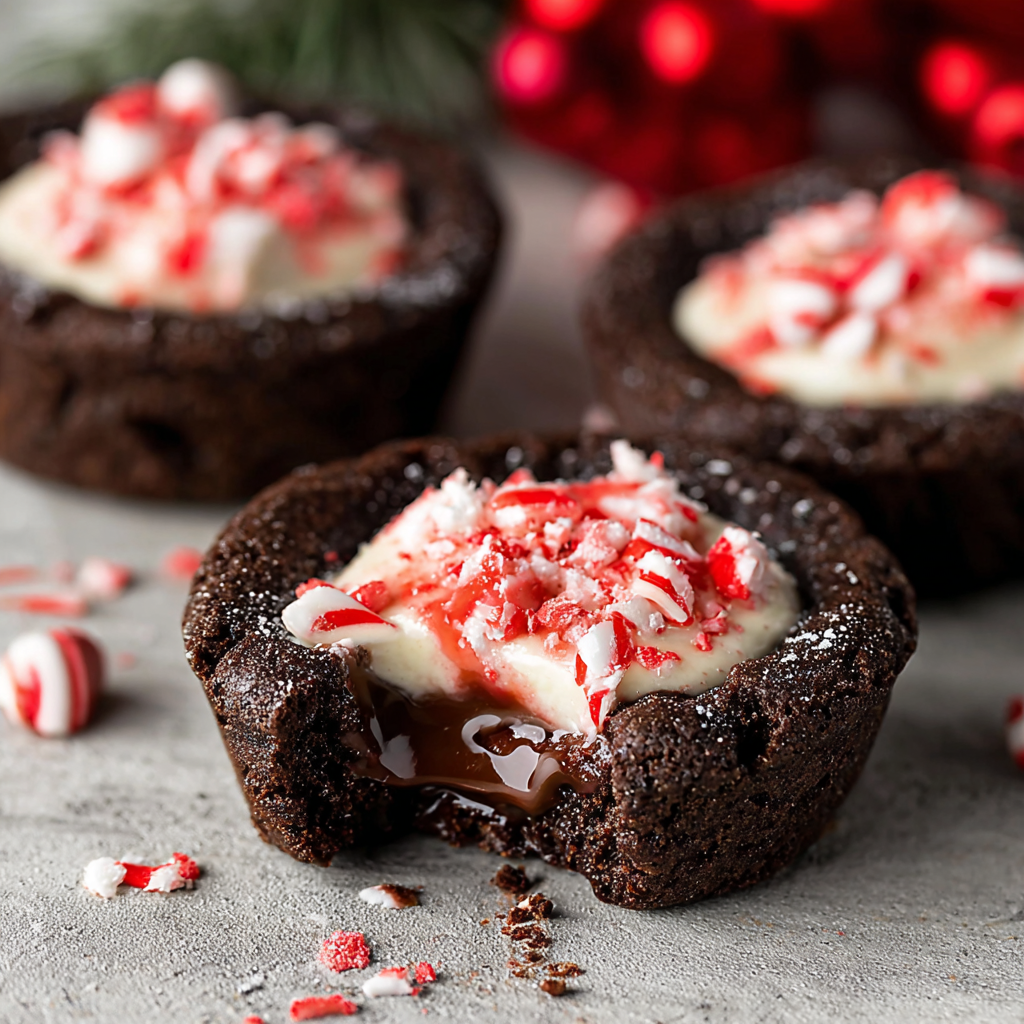
You Must Know
- Storage: Baked cups freeze well for up to 3 months. Store unfilled cups in an airtight container with parchment between layers to avoid sticking.
- Refrigeration: The filled cups keep refrigerated for 3–4 days; bring to room temperature 10–15 minutes before serving for best mouthfeel.
- Nutritional note: These are an indulgent treat — rich in fat and sugar. Consider smaller portions if serving a large crowd.
- Technique tip: Press wells while cups are still warm. Waiting until fully cool will crack the cookie and make shaping difficult.
My favorite part is how portable they are: I once delivered a tin to a neighbor after a snowstorm and she called to say they were gone in an hour. The contrast of bold chocolate and bright peppermint always earns compliments — and the crushed candy cane topping gives an addictive crunch that kids and adults both love.
Storage Tips
To maintain texture and flavor, store baked but unfilled cups at room temperature for up to 24 hours in an airtight container, or refrigerate them for up to 3 days. For longer storage, freeze the baked shells flat on a tray, then transfer to a freezer bag with parchment layers for up to 3 months. Thaw in the refrigerator and bring to room temperature before filling. Once filled, keep the cups chilled to preserve the peppermint cheesecake texture; remove from the fridge 10–15 minutes before serving so the filling softens slightly for best mouthfeel.
Ingredient Substitutions
If you don’t have black cocoa, substitute with an additional 1/4 cup Dutch-processed cocoa for slightly less dramatic color but the same chocolate flavor. For a lighter filling, swap half of the heavy cream with mascarpone for a richer mouthfeel and less whipped volume. To make these gluten-free, use a 1:1 gluten-free flour blend that contains xanthan gum, though the texture will be a touch more tender. For a lower-sugar version, reduce the filling sugar to 1/3 cup and use a superfine sugar substitute, but note the structure and sweetness will change slightly.
Serving Suggestions
Serve these cups on a festive platter garnished with whole mini candy canes, fresh mint sprigs, or a dusting of cocoa. They pair beautifully with strong coffee or a simple hot chocolate for a double-chocolate experience. For a party, place them in mini paper liners and arrange on tiered stands; they also make elegant edible favors when boxed with tissue. Consider pairing with citrusy desserts or a light fruit salad to cut through the richness if serving as part of a dessert spread.
Cultural Background
Chocolate and peppermint has long been a holiday pairing in Western baking, with peppermint’s cooling profile balancing rich winter confections. These cups are a modern, portable take on classic peppermint bark and chocolate-filled desserts — blending cookie craftsmanship with the creamy, tangy texture of cheesecake. The idea of shaping cookies into cups borrows from European tartlet techniques, but the combination of cocoa powders gives this version a distinctly contemporary, high-contrast look.
Seasonal Adaptations
In colder months, emphasize the peppermint; add a tiny amount of espresso powder to the dough to deepen chocolate notes. For spring or summer gatherings, swap the peppermint extract for a teaspoon of orange extract and garnish with candied orange peel for a citrus-chocolate variation. If you want a festive Halloween version, keep the cocoa blend and color the filling with small drops of orange gel and top with chopped dark chocolate instead of candy canes.
Meal Prep Tips
To streamline production, bake the cookie cups a day ahead and freeze them flat. Make the filling the morning you plan to serve and keep it chilled until assembly. Use a piping bag fitted with a wide round tip to fill shells quickly and cleanly. Store filled cups in shallow airtight containers and separate layers with parchment. For large batches, enlist help to press wells while another person scoops dough and a third handles filling and garnishing.
These cups are one of my favorite holiday shortcuts that still feel special — they’re easy to scale, travel well, and always prompt requests for the recipe. Give them a try and don’t be surprised if they become a new seasonal staple at your table.
Pro Tips
Press the wells while the cups are still warm to create a clean, even indentation.
Chill the mixing bowl and whisk before whipping cream to speed up whipping and improve volume.
Use a 3-tablespoon scoop for consistent cup sizes and even baking.
Freeze baked shells flat before transferring to a container to prevent sticking.
Add a small amount of espresso powder to the dough to intensify chocolate flavor without adding flavor of coffee.
This nourishing chocolate peppermint cookie cups recipe is sure to be a staple in your kitchen. Enjoy every moist, high protein slice — it is perfect for breakfast or as a wholesome snack any time.
Tags
Chocolate Peppermint Cookie Cups
This Chocolate Peppermint Cookie Cups recipe makes perfectly juicy, tender, and flavorful steak every time! Serve with potatoes and a side salad for an unforgettable dinner in under 30 minutes.
Ingredients
Chocolate Cookie Cups
Peppermint Cheesecake Filling
Instructions
Prepare the dry mix
Preheat oven to 350°F. Whisk together all-purpose flour, Dutch-processed cocoa, black cocoa, baking soda, and salt until uniformly combined and free of lumps.
Cream butter and sugars
Beat room-temperature unsalted butter with granulated and light brown sugar on medium-high until light and fluffy, about 2–3 minutes, scraping the bowl once or twice.
Add eggs and vanilla
Reduce mixer speed and add eggs one at a time, beating until incorporated. Add vanilla extract and mix briefly to combine.
Combine with dry ingredients
Add the flour-cocoa mixture on low speed and mix until just combined. Avoid overmixing to prevent tough cups; chill dough briefly if needed.
Scoop and bake
Grease two regular cupcake pans. Using a 3-tablespoon scoop, portion dough into each cup. Bake at 350°F for 10–13 minutes until edges are set but centers remain slightly soft.
Form wells and cool
Immediately press the center of each warm cup with a small jar to create wells. Cool in pans 10 minutes, loosen and transfer to a wire rack to cool completely.
Make peppermint filling
Chill bowl and whisk; whip heavy cream to soft peaks. Beat cream cheese with sugar until smooth, fold in whipped cream and peppermint extract. Add a drop of red gel to ripple color if desired.
Assemble and garnish
Pipe or spoon the filling into cooled chocolate cups and top with chopped candy canes. Chill 30 minutes before serving to set.
Last Step: Please leave a rating and comment letting us know how you liked this recipe! This helps our business to thrive and continue providing free, high-quality recipes for you.
Nutrition
Did You Make This?
Leave a comment & rating below or tag
@festive-cooks on social media!
Categories:
You might also like...

Air Fryer Bang Bang Cauliflower
Crispy air fryer cauliflower tossed in a creamy sweet-spicy bang bang sauce for a crowd-pleasing, quick appetizer or weeknight treat.

Air Fryer Buffalo Cauliflower
Crispy battered cauliflower florets tossed in a tangy buffalo sauce, ready in the air fryer for a spicy, crowd pleasing snack or light meal.

Air Fryer Honey Butter Garlic Chicken
Crispy, juicy chicken tossed in a glossy honey-butter-garlic glaze — ready in minutes with an air fryer for an easy weeknight favorite.
Did You Make This?
Leave a comment & rating below or tag @festive-cooks on social media!
Rate This Recipe
Share This Recipe
Enjoyed this recipe? Share it with friends and family, and don't forget to leave a review!
Comments (1)
This recipe looks amazing! Can't wait to try it.
Comments are stored locally in your browser. Server comments are displayed alongside your local comments.

Hi, I'm Jessica!
What's Popular

30-Minute Meals!
Join to receive our email series which contains a round-up of some of our quick and easy family favorite recipes.