
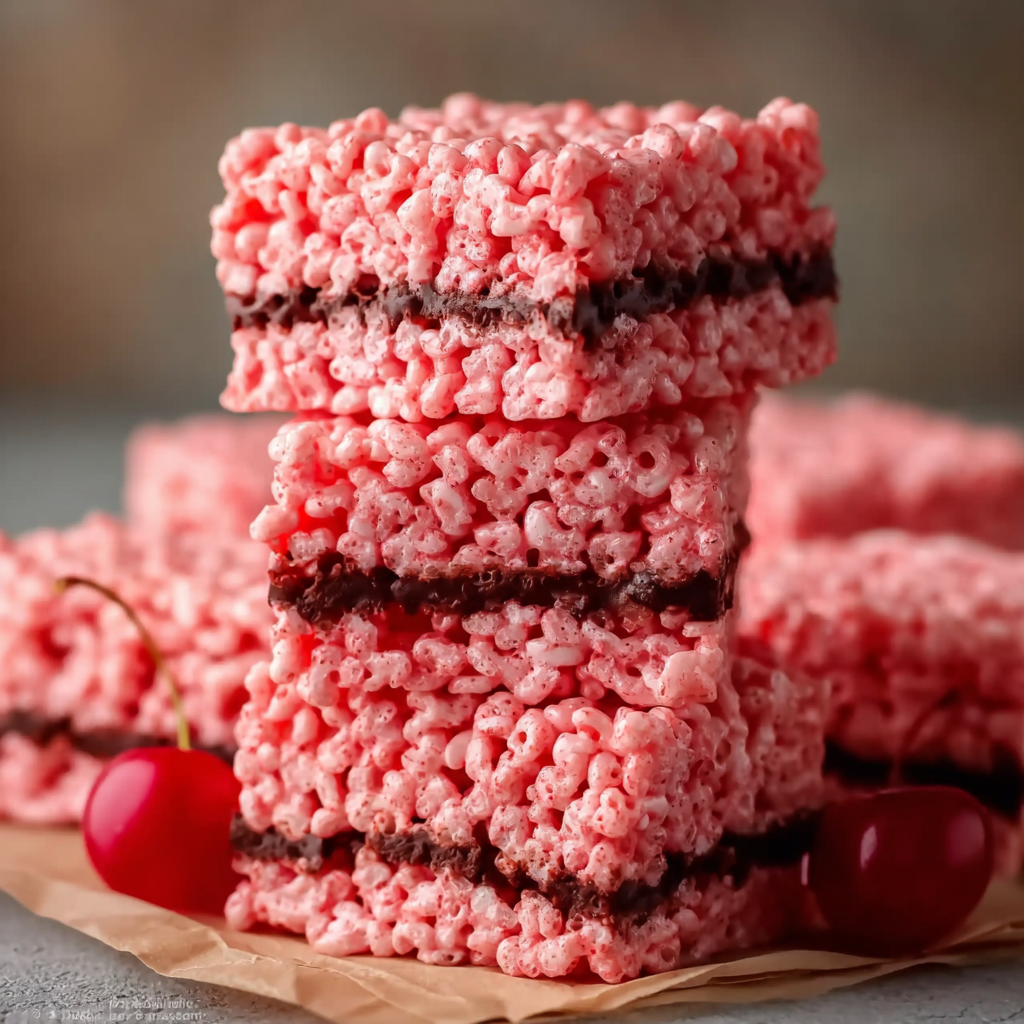
Cherry Rice Krispie Treats

Buttery, cherry-kissed marshmallow bars topped with dark chocolate make a nostalgic and festive twist on the classic Rice Krispie treat.
This cherry Rice Krispie treat is the kind of nostalgic dessert that transports me back to kitchen counters dusted with powdered sugar and the muffled laughter of holiday crowds. I first developed this version when I wanted to give a classic childhood favorite a grown-up edge for a winter gathering. The addition of cherry gelatin adds a bright, slightly tangy fruit note while the dark chocolate topping brings depth and a silky finish. The texture is everything: crisp rice cereal pockets bound in a tender, chewy marshmallow matrix, then crowned by a glossy chocolate layer that snaps with each bite.
I discovered the balance of flavors one January afternoon when I had a surplus of mini marshmallows and a bag of dark wafers leftover from cookie decorating. A little experiment with cherry JELL-O powder transformed the ordinary into something that became the hit of a potluck. Friends commented that the treats tasted familiar but more sophisticated, perfect with coffee or a late-night glass of milk. These bars are quick to assemble, store well, and are easy to adapt for thicker or thinner portions depending on the pan you choose.
Why You'll Love This Recipe
- The combination of cherry gelatin and dark chocolate elevates a childhood favorite into a more sophisticated dessert while staying incredibly simple to make.
- Ready from start to finish in roughly 30 minutes of active time, with an hour of resting to set; ideal for quick party prep or last-minute guests.
- Uses pantry staples and widely available branded ingredients like Ghirardelli wafers and JELL-O cherry gelatin for consistent flavor.
- Flexible pan options: use a 13x9 for standard bars or a 9-inch square pan for thicker, indulgent squares to serve as handheld treats.
- Make-ahead friendly: set them, refrigerate or leave at room temperature, and the treats hold structure for several days in a covered container.
- Customizable with sprinkles, nuts, or a drizzle of white chocolate for seasonal themes and color contrasts.
In my experience these bars travel well to potlucks and school events. Family members often ask for the recipe because the cherry flavor is subtle but memorable. Once I brought a pan to a birthday brunch and half the tray disappeared before coffee was poured. The dessert consistently gets compliments for being both familiar and unexpectedly refined.
Ingredients
- Rice Krispies cereal (6 cups): Choose the classic Rice Krispies for their airy crispness; measure the cups after gently spooning into the measuring cup rather than compacting to avoid dense bars.
- Ghirardelli dark chocolate melting wafers (10 ounces): The higher cocoa content gives a deep chocolate finish and a glossy set when melted. Choose wafers formulated for melting or use good-quality dark chocolate chips.
- Unsalted butter (6 tablespoons): Butter adds richness and helps the marshmallow melt smoothly; use unsalted so you can control final seasoning.
- Mini marshmallows (16 ounces): Standard mini marshmallows melt quickly and create the chewy binder. One 16-ounce bag is ideal for even coverage.
- Cherry gelatin powder (1 1/2 tablespoons): Use JELL-O cherry gelatin powder (regular, not sugar-free) to infuse fruit flavor and a slight rosy color; it dissolves easily into the melted marshmallow.
- Sprinkles (optional): For festive presentation, choose nonpareils or jimmies. Add after chocolate is spread so they adhere without bleeding color.
Instructions
Prepare the pan: Butter a 13x9-inch baking dish or line a 9-inch square pan and butter it lightly for thicker squares. Using a larger pan produces thinner bars, while the smaller pan gives thicker, chewier pieces. Keeping the pan ready ensures you can move quickly once the marshmallows are melted. Melt butter and marshmallows: In a large, heavy-bottomed saucepan over low heat, melt 6 tablespoons unsalted butter. Add 16 ounces mini marshmallows and stir constantly with a heatproof spatula. Keep the heat low to avoid scorching; you want a glossy, smooth mixture where the marshmallows are fully liquefied. This takes roughly 5 to 8 minutes. The key visual cue is a uniform, slightly thickened mass with no lumps. Add cherry gelatin: Sprinkle 1 1/2 tablespoons cherry gelatin powder evenly over the melted marshmallow and stir until completely dissolved. The gelatin adds flavor and a hint of color. If the mixture tightens when you add the powder, briefly lift the pan from heat and continue stirring; residual heat will finish the job. Fold in cereal: Remove the pot from heat and fold in 6 cups Rice Krispies cereal in two additions to ensure even coating. Use a light hand to preserve the cereal's crispness. Work quickly because the marshmallow will begin to set as it cools. Aim for an even distribution with pockets of crisp that contrast the chewy marshmallow. Press into the pan: Transfer the mixture to the prepared pan. Use a piece of greased wax paper or a buttered spatula to press the mixture firmly and evenly without packing it so tight that the treats lose crispness. For a smooth top, press with the greased paper in a rolling motion. Let the pan cool slightly while you melt the chocolate. Melt and spread chocolate: Gently melt 10 ounces dark chocolate wafers in a microwave-safe bowl in 20-second intervals, stirring between bursts to avoid overheating, or melt using a double boiler. Once smooth, pour and spread the chocolate evenly over the pressed cereal layer using an offset spatula. If you plan to add sprinkles, do so while the chocolate is still wet for best adhesion. Set and cut: Let the bars set at room temperature for about one hour or speed up setting by placing them in the refrigerator for 20 to 30 minutes. Once the chocolate is firm, run a sharp knife under hot water, dry it, then slice the bars into squares. Clean the knife between cuts for neat edges. Store and serve: Store finished squares in a covered container at room temperature for up to three days for optimal chewiness, or refrigerate for a firmer texture. For longer storage, wrap individually and freeze for up to three months.
You Must Know
- These treats are not gluten-free when made with standard Rice Krispies because of malt flavoring; use certified gluten-free crisped rice for a gluten-free version.
- Marshmallows contain gelatin and are not vegetarian or vegan; vegan marshmallow alternatives exist but will change texture.
- The chocolate layer sets best if spread thinly; a thicker layer will take longer to fully firm and may crack when cutting if chilled too quickly.
- Store at room temperature for the best chew; refrigeration firms them up and can make them chewier when cold.
One of my favorite aspects is how small tweaks change the personality of this treat. A dusting of flaky sea salt over the warm chocolate can turn them into a trendy dessert for adults, while rainbow sprinkles immediately make them party-friendly for children. Family members always ask whether they can have another before the first tray is even cut, which says a lot about how crowd-pleasing this version is.
Storage Tips
For short-term storage, keep the bars in an airtight container at room temperature for up to three days to maintain chewiness and crisp contrast. If you prefer a firmer bite, refrigerate the container and allow bars to come to room temperature briefly before serving. For longer storage, wrap individual squares in plastic wrap and place them in a freezer-safe bag for up to three months. Thaw at room temperature for 30 to 60 minutes before serving. Avoid stacking and pressing heavy items on top of the bars to preserve the chocolate topping.
Ingredient Substitutions
If you need to adapt ingredients, several swaps work well. Swap the Ghirardelli wafers for 10 ounces of dark chocolate chips plus 1 teaspoon coconut oil for shine; use a good-quality milk chocolate for a sweeter finish. For a gluten-free option, substitute certified gluten-free crisped rice cereal. To make the bars vegetarian, try marshmallows labeled vegetarian or vegan—note that texture will be slightly different and possibly less chewy. You can also replace butter with coconut oil for a hint of tropical flavor, though the mouthfeel will change.
Serving Suggestions
Serve these squares alongside hot coffee or a glass of cold milk. For a party platter, arrange them with fresh cherries or berries to echo the cherry flavor. They pair well with whipped cream or a scoop of vanilla ice cream if you want a dessert plate. Garnish with a light sprinkle of toasted coconut, chopped pistachios, or a drizzle of white chocolate for visual contrast. They make excellent grab-and-go treats for school lunches or picnic boxes.
Cultural Background
Rice cereal bars have been a staple of American home baking since the mid-20th century, prized for their simple technique and minimal baking. Adding flavored gelatin is part of a tradition of home cooks customizing boxed or pantry items to elevate them for holidays and potlucks. The cherry and chocolate combination echoes classic pairings in confections, where bright fruit notes balance rich cocoa. This iteration marries nostalgic childhood comfort with adult flavor sensibilities.
Seasonal Adaptations
For holiday seasons, swap cherry gelatin for strawberry or raspberry for a red theme, and top with white chocolate and red sprinkles. In summer, fold in dried cherries and a handful of chopped nuts into the cereal mixture for texture. During winter holidays, add a pinch of cinnamon to the melted marshmallow and use dark chocolate for a warming, cozy variation. For Valentine’s Day, finish with heart-shaped sprinkles.
Meal Prep Tips
These bars are excellent for make-ahead dessert prep. Press the mixture into the pan and cover with plastic wrap before adding the chocolate if you want to transport the base separately; spread chocolate on-site to avoid cracks. For portion control, cut the squares first, then individually wrap them in parchment for lunches or snacks. If making multiple pans, double the marshmallow and cereal quantities and melt chocolate in batches for consistent coverage.
In the end, these cherry Rice Krispie treats are a dependable crowd-pleaser that balance nostalgia with flavor sophistication. They are simple to prepare and endlessly adaptable, so make them your own and enjoy sharing the results with friends and family.
Pro Tips
Measure Rice Krispies by gently spooning into the measuring cup to avoid compacting for lighter bars.
Stir marshmallows constantly over low heat to prevent scorching and achieve a smooth bind.
Heat the knife before slicing by running it under hot water and drying for clean slices through the chocolate.
This nourishing cherry rice krispie treats recipe is sure to be a staple in your kitchen. Enjoy every moist, high protein slice — it is perfect for breakfast or as a wholesome snack any time.
FAQs about Recipes
What pan should I use?
Use a 13x9-inch pan for standard thickness; use a 9-inch square pan for thicker, chewier bars.
Can I use white chocolate instead of dark?
Yes, you can replace the chocolate with white chocolate, but it will taste sweeter and set slightly differently.
How long do these keep in the freezer?
Wrap squares individually and freeze for up to three months. Thaw at room temperature before serving.
Tags
Cherry Rice Krispie Treats
This Cherry Rice Krispie Treats recipe makes perfectly juicy, tender, and flavorful steak every time! Serve with potatoes and a side salad for an unforgettable dinner in under 30 minutes.
Ingredients
Main
Instructions
Prepare the pan
Butter a 13x9-inch pan or a 9-inch square pan for thicker bars. Lining with a greased piece of wax paper makes it easier to remove the set bars.
Melt butter and marshmallows
In a large saucepan over low heat, melt 6 tablespoons unsalted butter. Add 16 ounces mini marshmallows and stir constantly until fully melted and smooth, about 5 to 8 minutes.
Add cherry gelatin
Sprinkle 1 1/2 tablespoons cherry gelatin powder into the melted marshmallow and stir until completely dissolved and evenly distributed.
Fold in cereal
Remove from heat and gently fold in 6 cups Rice Krispies cereal until thoroughly coated, using two additions for even mixing.
Press into pan
Transfer mixture to prepared pan and press evenly with greased wax paper or a spatula. Avoid packing too tightly to keep the bars airy.
Melt chocolate and top
Melt 10 ounces dark chocolate wafers in 20-second microwave bursts or a double boiler. Spread evenly over the pressed cereal layer and add sprinkles if desired.
Set and cut
Allow to set at room temperature for about one hour or refrigerate for 20 to 30 minutes. Use a hot, dry knife to slice into squares and store in an airtight container.
Last Step: Please leave a rating and comment letting us know how you liked this recipe! This helps our business to thrive and continue providing free, high-quality recipes for you.
Nutrition
Did You Make This?
Leave a comment & rating below or tag
@festive-cooks on social media!
Categories:
You might also like...

Air Fryer Bang Bang Cauliflower
Crispy air fryer cauliflower tossed in a creamy sweet-spicy bang bang sauce for a crowd-pleasing, quick appetizer or weeknight treat.

Air Fryer Buffalo Cauliflower
Crispy battered cauliflower florets tossed in a tangy buffalo sauce, ready in the air fryer for a spicy, crowd pleasing snack or light meal.

Air Fryer Honey Butter Garlic Chicken
Crispy, juicy chicken tossed in a glossy honey-butter-garlic glaze — ready in minutes with an air fryer for an easy weeknight favorite.
Did You Make This?
Leave a comment & rating below or tag @festive-cooks on social media!
Rate This Recipe
Share This Recipe
Enjoyed this recipe? Share it with friends and family, and don't forget to leave a review!
Comments (1)
This recipe looks amazing! Can't wait to try it.
Comments are stored locally in your browser. Server comments are displayed alongside your local comments.

Hi, I'm Jessica!
What's Popular

30-Minute Meals!
Join to receive our email series which contains a round-up of some of our quick and easy family favorite recipes.