
Biscuev No‑Bake Cheesecake

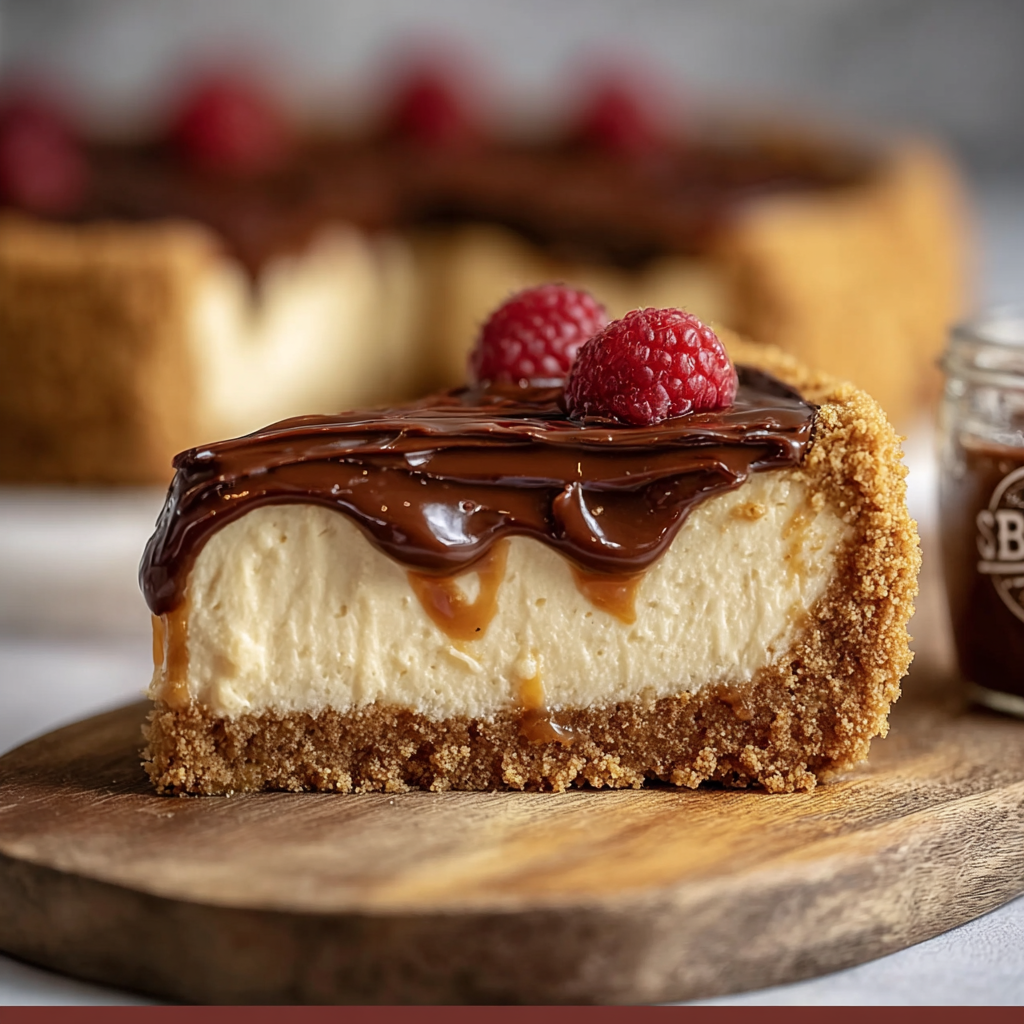
A silky, no-bake cheesecake layered with Biscoff biscuit crust and cookie‑butter filling — effortless to make and impossible to resist.
This no‑bake cheesecake has been my go‑to dessert for every celebration in the last two years. I first developed this version during a holiday cookie swap when I had a bag of leftover Biscoff biscuits and a craving for something creamy that required no oven. The sweet, caramelized spice of the biscuits pairs beautifully with a velvety cream cheese filling and cloud‑light whipped cream. The result is a dessert that looks impressive on the table but is forgiving in the kitchen — perfect for last‑minute hosting.
What makes this cheesecake special is the depth of flavor achieved without heat: crushed Biscoff biscuits toasted only by the butter in the crust, cookie butter folded into the filling for concentrated Biscoff intensity, and the final glossy drizzle that adds shine and nostalgia. Texture is key here — a crunchy, buttery base, a dense yet airy filling, and a silky topping. I often watch family members close their eyes mid‑bite and smile, which is my favorite kind of validation.
Why You'll Love This Recipe
- Hands‑on time is short: you can have this on the table in 25 minutes plus chilling time; it’s a true quick and easy dessert for holiday crowds and weeknight treats.
- Uses pantry staples: Lotus Biscoff biscuits and Biscoff spread keep the ingredient list friendly and grocery‑store accessible; no special tempering or baking skill required.
- Make‑ahead friendly: prepare up to two days in advance for stress‑free entertaining; chilling improves texture and flavor meld.
- Crowd‑pleasing balance: sweet, spiced cookies and creamy filling appeal to both cookie lovers and cheesecake fans; the topping offers visual finesse with minimal effort.
- Flexible scale: easy to double for a party or halve for a small household without changing technique or texture.
I remember bringing this to a friend’s dinner party where a skeptical host — who claimed not to be a cookie‑butter fan — tried a slice and immediately asked for the recipe. Since then it’s been requested for birthdays, potlucks, and the occasional quiet Sunday when we want something indulgent but simple.
Ingredients
- Biscoff biscuits (crust): Use about 2 1/2 cups of crushed Lotus Biscoff biscuits for a sturdy, flavorful base. I like to pulse them in a food processor to get a sandy texture; if you prefer a coarser crunch, pulse less. Fresh biscuits are best — stale cookies lose that caramel spice.
- Unsalted butter (crust): 1/2 cup melted butter binds the crumbs and browns slightly toasting the aroma; use quality butter like Plugra or Kerrygold for a richer finish.
- Cream cheese (filling): 16 ounces, softened to room temperature. Full‑fat cream cheese gives the smoothest, richest body; Philadelphia is a reliable brand that yields a clean tang.
- Powdered sugar (filling): 1/2 cup adds controlled sweetness with no grain. Sift if your powdered sugar is lumpy to avoid streaks in the filling.
- Biscoff spread (filling): 1/2 cup cookie butter folded into the cream cheese creates the signature flavor; use the smooth spread for even distribution.
- Vanilla extract (filling): 1 teaspoon — real vanilla deepens the dessert’s aroma and balances the cookie butter’s spice.
- Heavy cream (whipped): 1 1/4 cups whipped to soft peaks gives lift and lightness; chill your mixing bowl for best results.
- Topping: 1/4 cup melted Biscoff spread for a glossy drizzle and extra biscuits for garnish to add crunch and visual interest.

Instructions
Prepare the pan and crust: Line a 9‑inch springform pan with a circle of parchment and lightly grease the sides. Combine 2 1/2 cups crushed Biscoff biscuits with 1/2 cup melted unsalted butter in a bowl, stirring until the mixture holds together when pressed. Press the crumbs firmly and evenly into the bottom of the pan using the back of a measuring cup to compact. Chill in the refrigerator for at least 10 minutes to set; this helps prevent a soggy base once the filling is added. Beat the cream cheese base: In a large bowl, beat 16 ounces softened cream cheese with 1/2 cup powdered sugar until completely smooth and lump‑free, about 2–3 minutes on medium speed. Scrape the bowl often. Add 1/2 cup Biscoff spread and 1 teaspoon vanilla extract and continue to beat until fully incorporated; this step is where the cookie butter infuses the body with flavor, so be patient and ensure it is evenly combined. Whip and fold: Chill a mixing bowl and whisk attachment for 10 minutes, then whip 1 1/4 cups heavy cream to soft peaks. To keep the filling airy, fold one third of the whipped cream into the cream cheese mixture to loosen it, then gently fold in the remaining cream in two additions. Use a spatula and fold with a lift‑and‑turn motion to preserve air and avoid overmixing, which would deflate the filling. Assemble and chill: Spoon the filling over the chilled crust and smooth the top with an offset spatula. Tap the pan gently on the counter to release any trapped air. Refrigerate for at least four hours, ideally overnight; the chilling time allows the filling to firm and the flavors to meld. For a quicker set, freeze for 90 minutes, then transfer to the fridge to avoid freezing solid. Finish and serve: When ready to serve, warm 1/4 cup Biscoff spread in short bursts in the microwave until pourable and drizzle over the center of the cheesecake to create a glossy finish. Garnish with extra whole or halved Biscoff biscuits around the edge. Release the springform, transfer to a serving plate, and slice with a hot, dry knife for clean pieces.
You Must Know
- This dessert keeps well in the refrigerator for up to 4 days; cover loosely with plastic wrap to prevent condensation on the topping.
- For freezing, wrap the cake whole in two layers of plastic and freeze for up to 3 months; thaw in the fridge overnight before serving.
- It’s high in fat and calories — a rich treat best enjoyed in modest slices; each serving is indulgent and satisfying.
- Biscoff products contain wheat and soy; see allergen notes below if you need substitutions.
One of my favorite aspects is how the flavors settle overnight: the biscuit base softens slightly while retaining structure, and the cookie‑butter note becomes deeper and more caramelized. I’ve served this at summer barbecues and winter dinners — it always feels like a little luxury, whether plated simply or decorated for a party.
Storage Tips
Store wrapped in the refrigerator for up to four days. For best texture, place the cake on a flat plate and cover lightly with plastic wrap, avoiding direct contact with the topping. If you need to transport it, freeze for 30–45 minutes to firm the filling, then transfer to a cake carrier. For long‑term storage, freeze the whole cheesecake for up to three months; tightly wrap in plastic followed by foil to prevent freezer burn. Thaw in the refrigerator overnight and drizzle fresh Biscoff spread just before serving for the best shine.
Ingredient Substitutions
If you can’t find Lotus Biscoff biscuits or spread, speculoos or gingernut cookies make a good substitute, though flavor will be slightly less caramelized. For a gluten‑free version, use a certified gluten‑free cinnamon cookie and ensure the cookie butter is GF. To reduce sugar, replace powdered sugar with a milder sweetener like confectioners’ stevia blend (adjust to taste) and use a lighter cookie butter or reduce the amount to 1/3 cup; texture will be similar but slightly less sweet.
Serving Suggestions
Serve slices with a dollop of lightly whipped cream and a few crushed Biscoff crumbs for contrast. Fresh berries cut through the richness — tart raspberries or a spoonful of macerated strawberries are excellent. For a party, place small squares on dessert plates and add a sprig of mint for color. Pair with coffee or a late‑harvest dessert wine to highlight the caramel and spice notes.
Cultural Background
Biscoff biscuits originate from Belgium and are known as speculoos; their warm, spiced caramel flavor is similar to gingerbread but without the strong ginger. The cookie‑butter craze started when the spread was commercialized from these biscuits, and combining it with classic cream cheese techniques bridges European cookie tradition with an American favorite. This fusion celebrates how pantry staples from different cuisines can create a new, beloved dessert.
Seasonal Adaptations
In autumn, add a pinch of ground cinnamon and nutmeg to the crust for extra warmth. For summer, top each slice with macerated cherries or a citrus curd to brighten the palate. During the holidays, decorate with candied orange peel and toasted hazelnuts. Small adjustments to garnish and spice take the same base recipe from casual to festive with minimal effort.
Meal Prep Tips
To plan ahead, make the crust and filling a day before serving and keep them refrigerated separately; assemble on the day you serve for the freshest texture. Portion into small individual jars or ramekins for grab‑and‑go desserts — fill crust first, then the filling, and chill. Use a silicone spatula to scrape the bowl clean for minimal waste; saved scrapings can top ice cream or be stirred into coffee for an indulgent treat.
This no‑bake cheesecake is one of those simple pleasures that feels celebratory every time. It’s forgiving, adaptable, and a true crowd‑pleaser — I hope you enjoy making it as much as we do.
Pro Tips
Soften cream cheese to room temperature for a lump‑free, silky filling; cold cream cheese will create bumps in the mixture.
Chill the mixing bowl and whisk before whipping cream to achieve soft peaks more easily and with less effort.
Press the crust firmly and evenly into the pan; compacting prevents crumbling when slicing and gives a professional edge.
This nourishing biscuev no‑bake cheesecake recipe is sure to be a staple in your kitchen. Enjoy every moist, high protein slice — it is perfect for breakfast or as a wholesome snack any time.
FAQs about Recipes
How long should I chill before serving?
Chill at least 4 hours or ideally overnight. For quicker serving, freeze 90 minutes then chill to avoid a frozen center.
Can I make this gluten‑free?
Yes — use gluten‑free spiced cookies and a GF cookie butter, but expect a slight change in flavor intensity.
Tags
Biscuev No‑Bake Cheesecake
This Biscuev No‑Bake Cheesecake recipe makes perfectly juicy, tender, and flavorful steak every time! Serve with potatoes and a side salad for an unforgettable dinner in under 30 minutes.
Ingredients
Crust
Filling
Topping
Instructions
Prepare the pan and crust
Line a 9‑inch springform pan with parchment. Combine crushed Biscoff biscuits and melted butter, press into bottom of pan, and chill 10 minutes to set.
Beat the cream cheese base
Beat softened cream cheese with powdered sugar until smooth, then add Biscoff spread and vanilla until fully combined.
Whip and fold
Whip heavy cream to soft peaks. Fold one third into the cream cheese mixture to loosen, then fold in remaining cream gently to keep the filling airy.
Assemble and chill
Spoon filling over chilled crust, smooth, and refrigerate at least 4 hours or overnight for best texture.
Finish and serve
Warm 1/4 cup Biscoff spread until pourable, drizzle over cheesecake, garnish with biscuits, release springform, and slice with a hot knife.
Last Step: Please leave a rating and comment letting us know how you liked this recipe! This helps our business to thrive and continue providing free, high-quality recipes for you.
Nutrition
Did You Make This?
Leave a comment & rating below or tag
@festive-cooks on social media!
Categories:
You might also like...

Air Fryer Bang Bang Cauliflower
Crispy air fryer cauliflower tossed in a creamy sweet-spicy bang bang sauce for a crowd-pleasing, quick appetizer or weeknight treat.

Air Fryer Buffalo Cauliflower
Crispy battered cauliflower florets tossed in a tangy buffalo sauce, ready in the air fryer for a spicy, crowd pleasing snack or light meal.

Air Fryer Honey Butter Garlic Chicken
Crispy, juicy chicken tossed in a glossy honey-butter-garlic glaze — ready in minutes with an air fryer for an easy weeknight favorite.
Did You Make This?
Leave a comment & rating below or tag @festive-cooks on social media!
Rate This Recipe
Share This Recipe
Enjoyed this recipe? Share it with friends and family, and don't forget to leave a review!
Comments (1)
This recipe looks amazing! Can't wait to try it.
Comments are stored locally in your browser. Server comments are displayed alongside your local comments.

Hi, I'm Jessica!
What's Popular

30-Minute Meals!
Join to receive our email series which contains a round-up of some of our quick and easy family favorite recipes.